

This intervention was designed primarily to prevent early reading failure but also as a remediation technique for students diagnosed with reading decoding problems/dyslexia. It is totally research-based and was developed by Lynda Boucugnani- Whitehead, Ph.D., William Allen, Ph.D., and Janice Kilburn, Ph.D.
The technique was also used in a formal research study that involved trained high school teacher cadets working for a one-year period with children at risk for reading failure in two elementary schools. The program was highly successful and even highlighted by USA today as an example of innovative work within public schools.
It is important for parents to understand that there is a big difference between reading decoding, or the ability to figure out words using sounds and strategies and reading comprehension. These two distinct skills utilize different systems within our brains. Many students diagnosed with dyslexia do very well with reading comprehension in later years, as well as oral comprehension in early years but have difficulty with the decoding process. This can make later reading very slow in pace which can have some ramifications for comprehension but also puts quite a burden on the student.
There are four basic components of learning to decode words. These include:
- Understanding of letter sounds that match with the visual symbol. This involves phonological awareness but also is a component of phonics.
- Phonological awareness – which involves the understanding of sound sequences and the ability to manipulate sounds within words. This is sometimes referred to as phonemic awareness.
- Explicit phonics instruction which incorporates spelling with the child’s understanding of letter and sound correspondences
- And probably the most important – learning of metacognitive strategies to build words and start to recognize patterns fluently.
You’re probably asking what are metacognitive strategies? Let’s make that simple. It’s basically thinking about your own thinking. So let’s say you have learned a word like “at” and you have been taught through this intervention that by adding different consonants to “at”, you can make many different words. It requires you to think about what you are doing so you need to be taught to do this in a very specific way. The last part of this intervention is designed to build these metacognitive skills.
So what will you need to be able to do this intervention at home? This is meant to be an adjunct – though a very powerful one – to explicit instruction with the four basic components through school or tutoring.
You need:
- At least 4 – 1 inch colored wooden blocks
- A set of magnetic letters – lowercase – and preferably with consonants and vowels in different colors if you can
- A cookie sheet from your kitchen
- Some index cards
Stage I
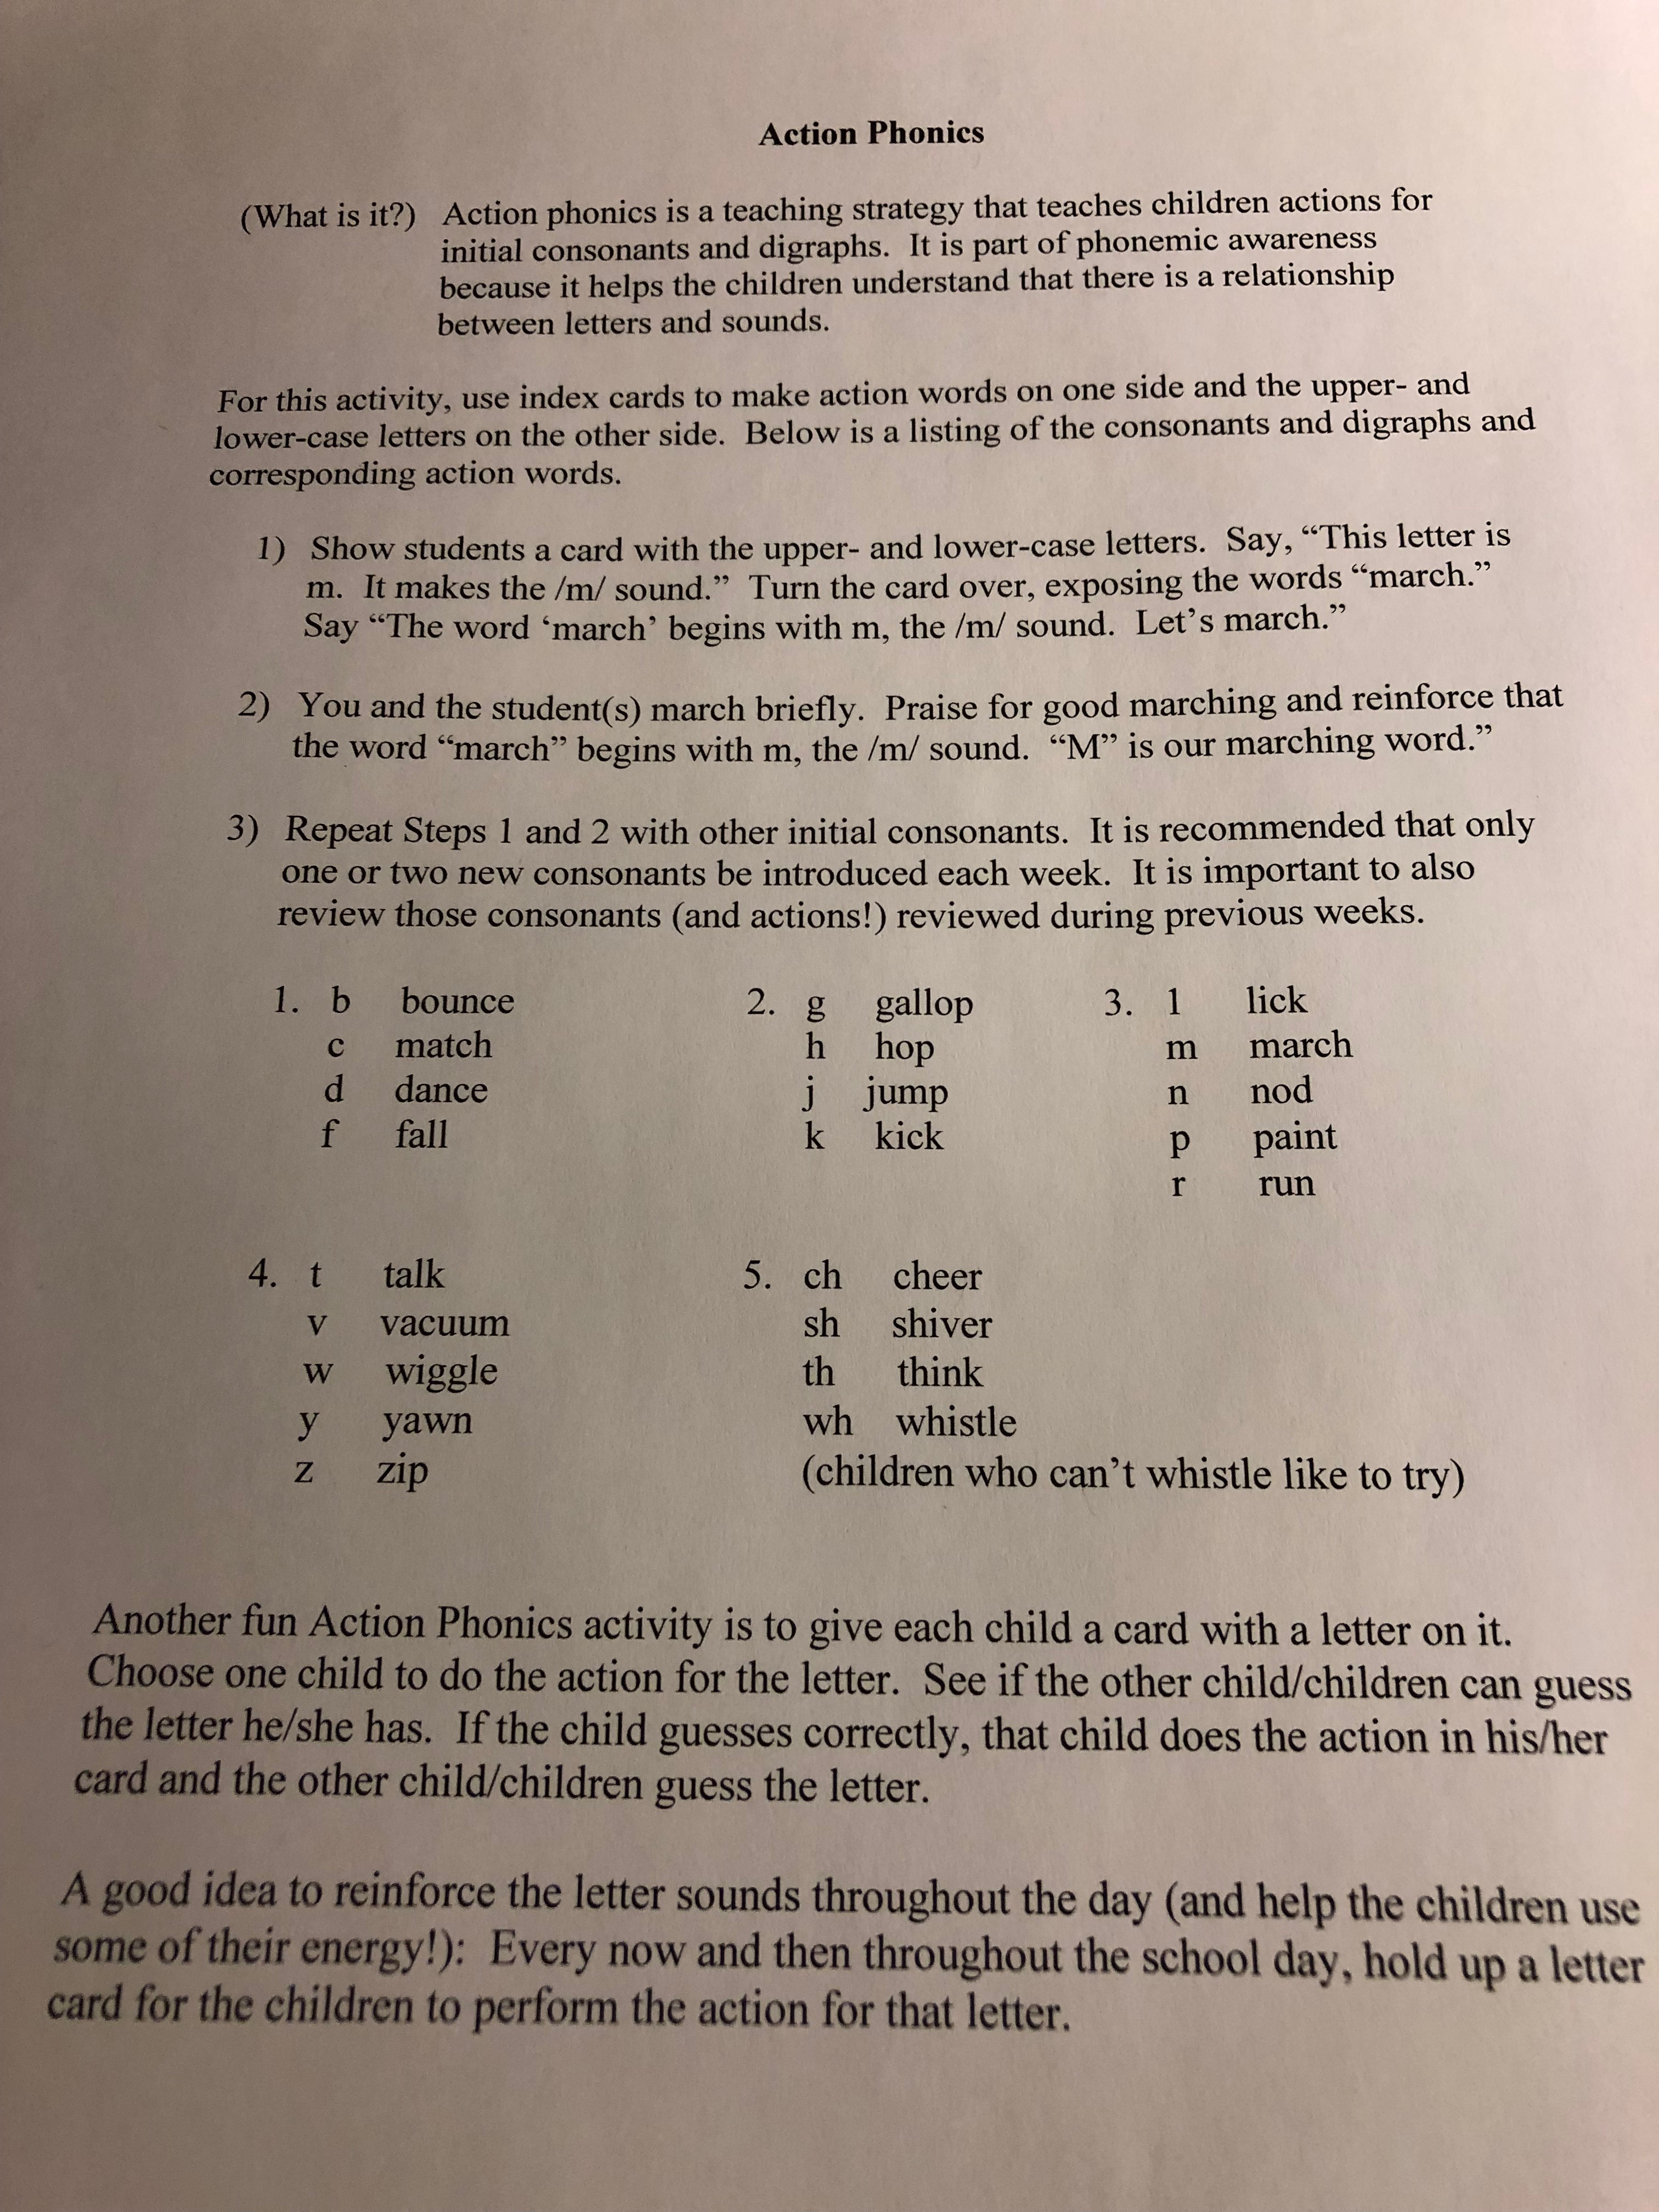
Building the association between letter sounds and the visual letter. I highly recommend using a technique such as Action Phonics for this stage. Incorporating movement as your child is learning these associations makes them more powerful and easier to remember. It is very easy and fun to do and is your first step.
Please tap on the button to access the directions for doing Action Phonics.
Stage 2 – Call this Sound Counting with Blocks
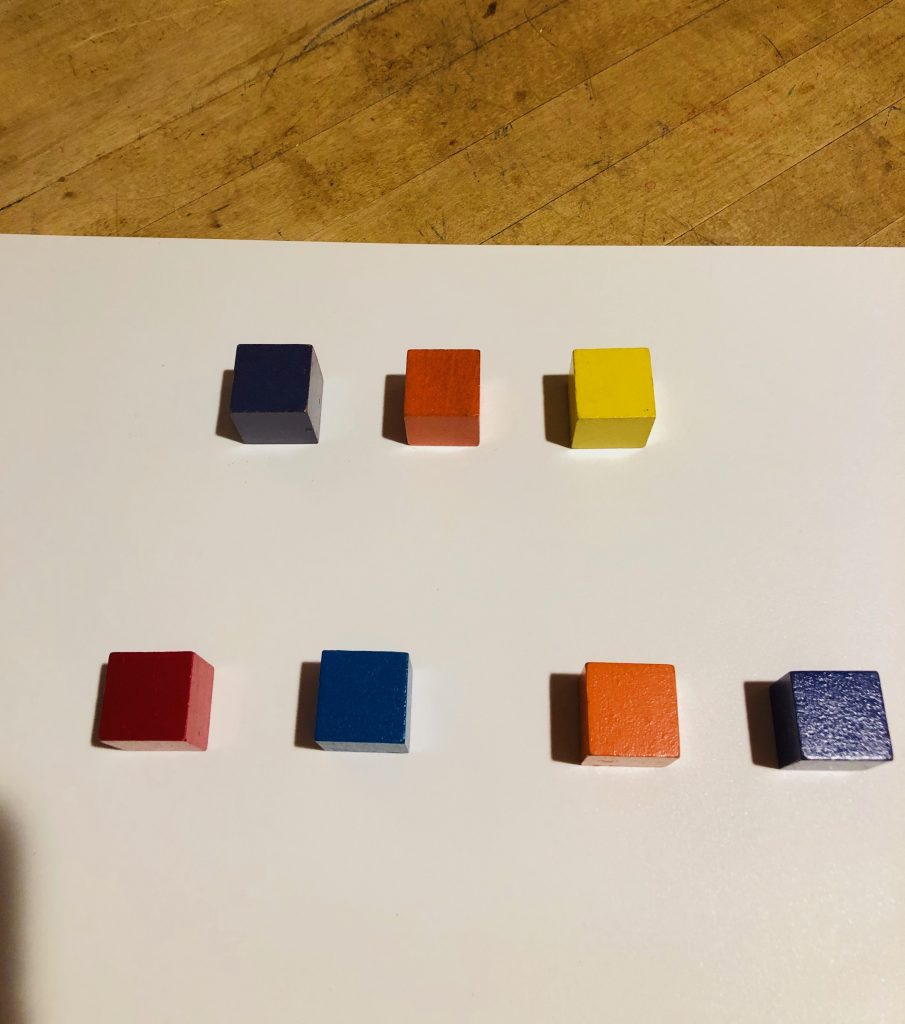
This is where you’re going to use the blocks. Use a white sheet of paper and put the blocks (3) on the paper. This is an exercise to teach the child that words are made up of sounds. The student is to place a block on a sheet of paper for each sound she/he hears in a word. It is important to note that the “teacher” needs to say the words in a “stretched-out” way – so that the individual sounds are exaggerated. The child should repeat the word and then place blocks for each sound she/he hears. For example, for the word “met”, the teacher says the word in a stretched-out way, the child repeats the word and then she/he puts three blocks on a piece of paper.
Say to the child: “ Listen to what I say and put a block on this paper for every sound you hear”. This will need to be modeled for the student a few times to help her understand the exercise.
There is a very specific sequence and procedure to follow when performing this task with the student. We will use sequences of sounds, using the word families, that always start with only one sound (one block) and gradually go up to as many as four sounds (blocks), within the word. This sequence is extremely important to follow.
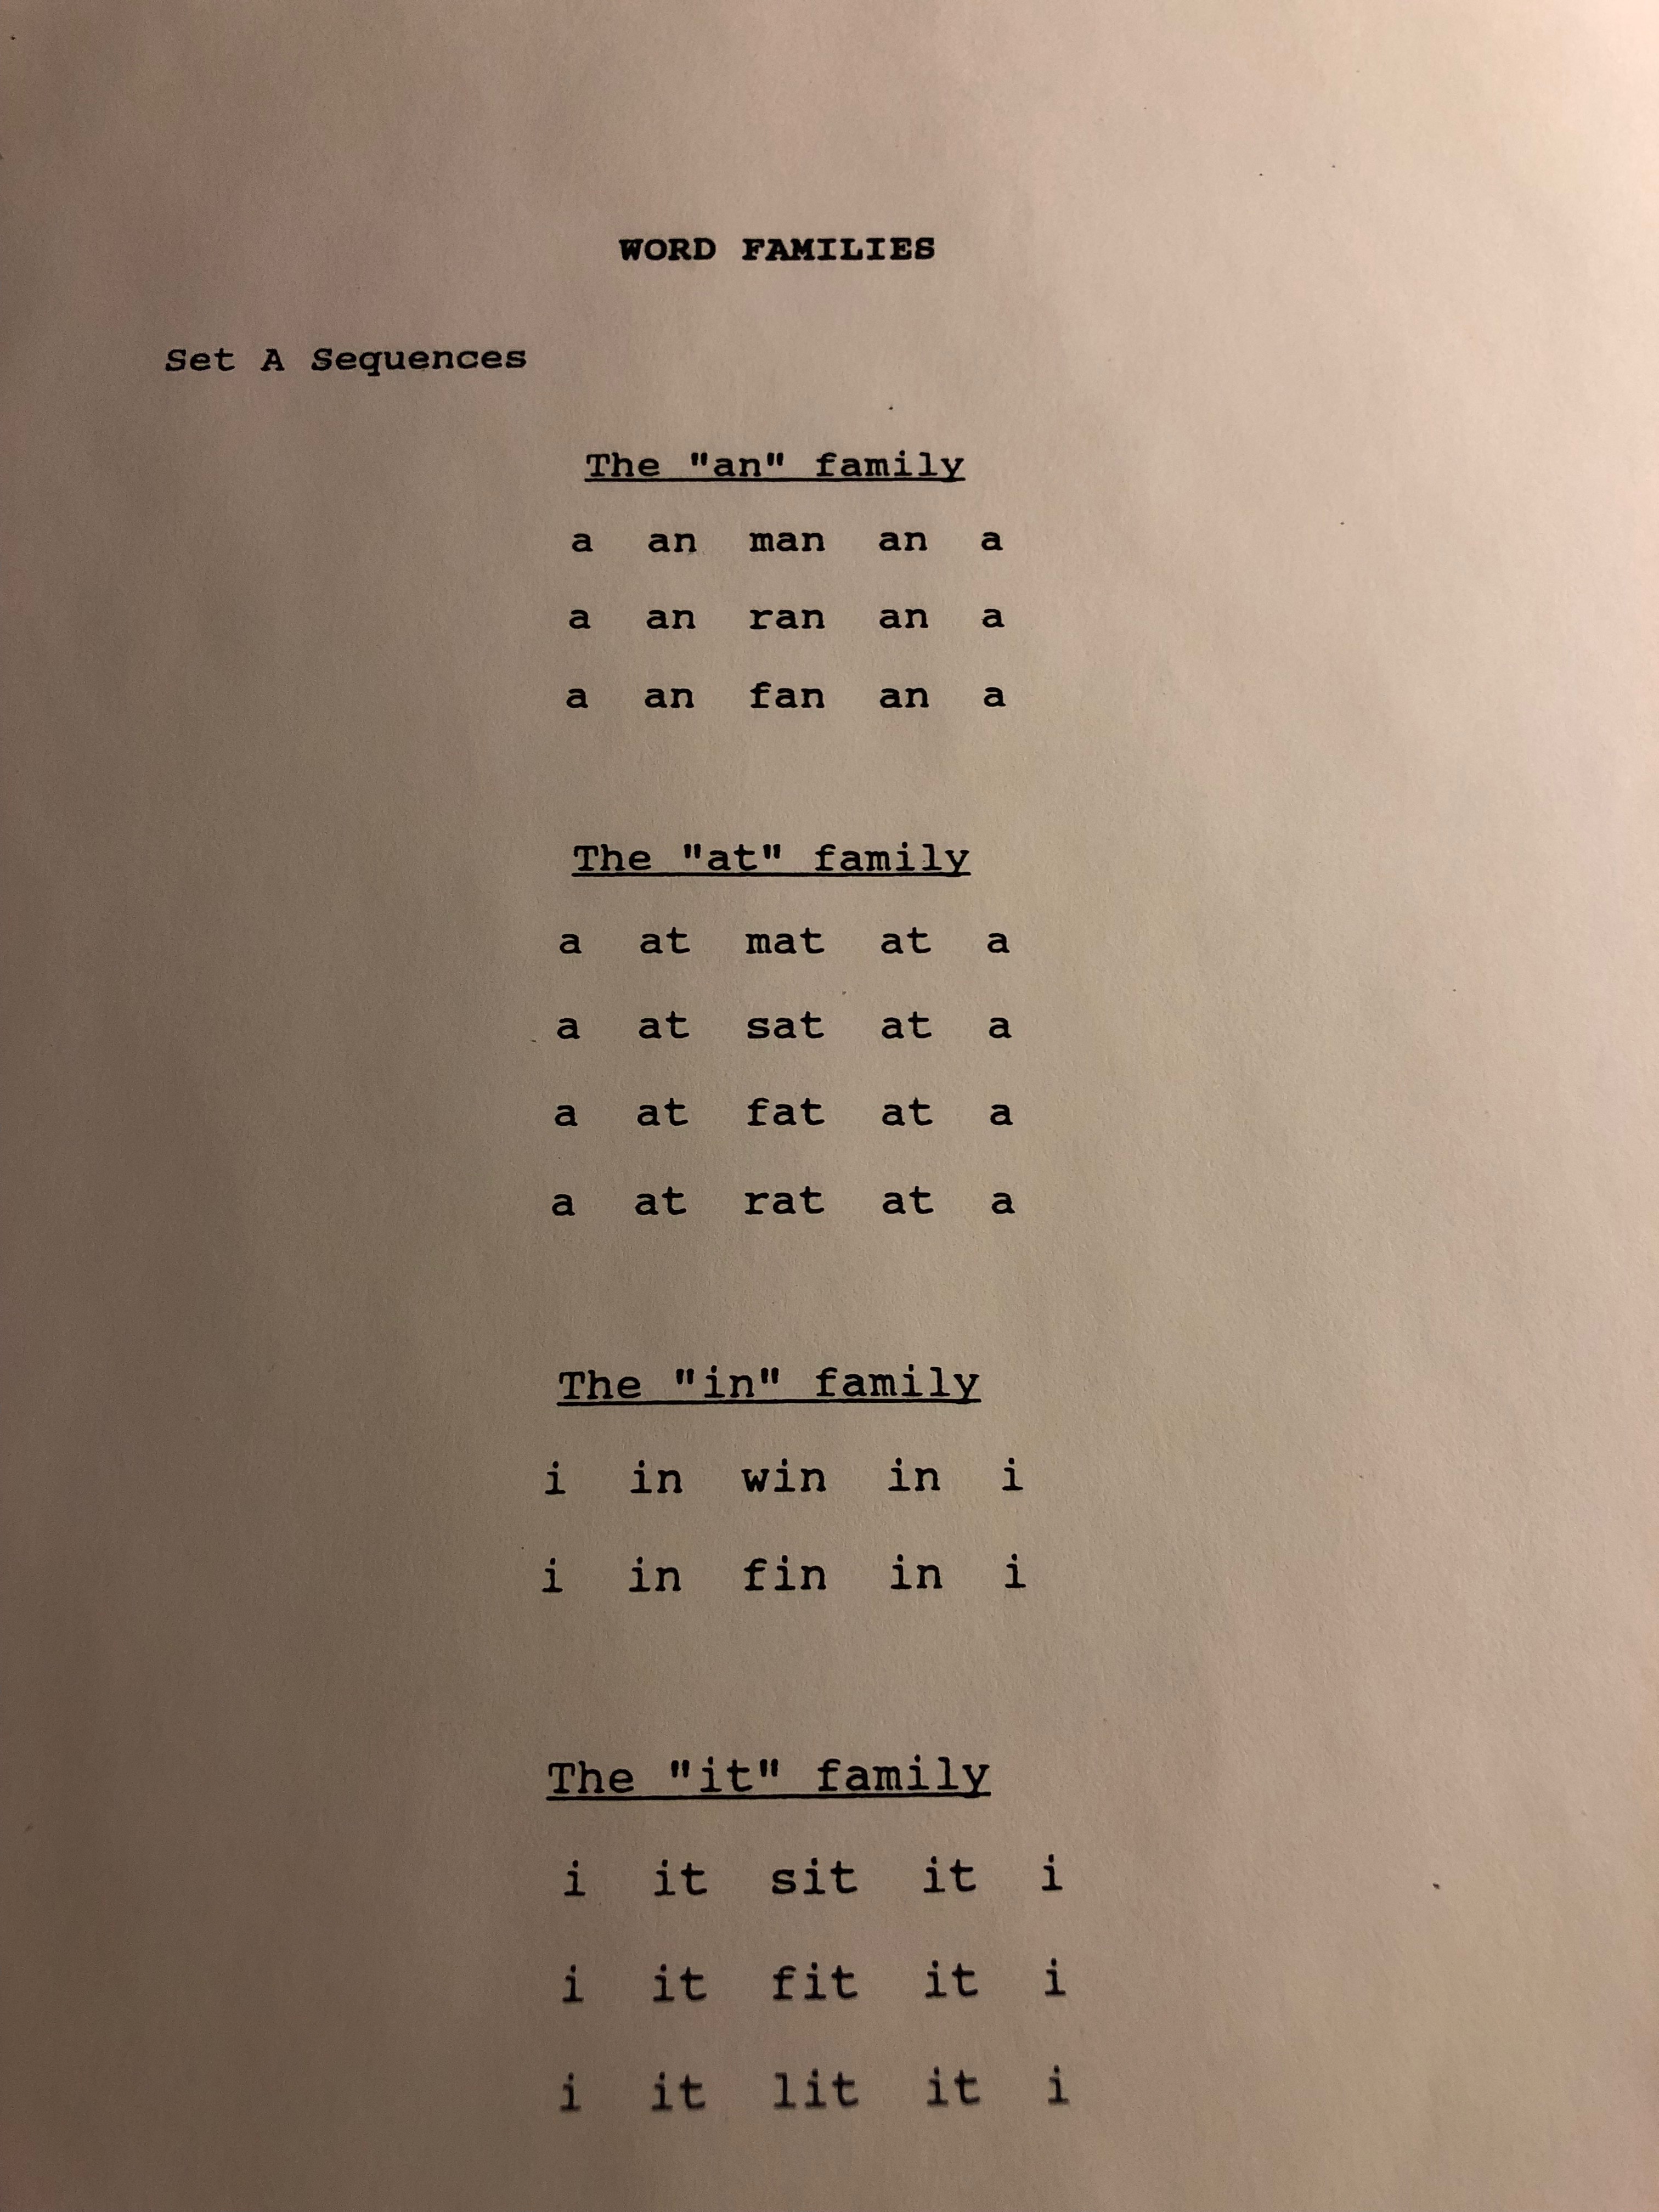
These are divided into Set A sequences – which have a maximum of three letters and Set B sequences which have a maximum of four letters. As an example using the word family “it”, a Set A sequence would look like this:
i – it – lit – it – i (Remember to stretch out the sounds)
You can see that you are starting with one sound and go up until you have three sounds and then go back down again in order to one sound.
There are four-word families that will be used with these Set A sequences that go up to three sounds within a word.
Once the student has shown that they can perform this first operation successfully with all four-word families we will proceed to the second part of sound counting with blocks.
Second – again using the Set A sequences, now you can start at any point – with either one sound, two letter sounds or three but again use the ascending and descending cycle. For example,
it—lit—it—i- it
Do the second part with all four of the word families in Set A.
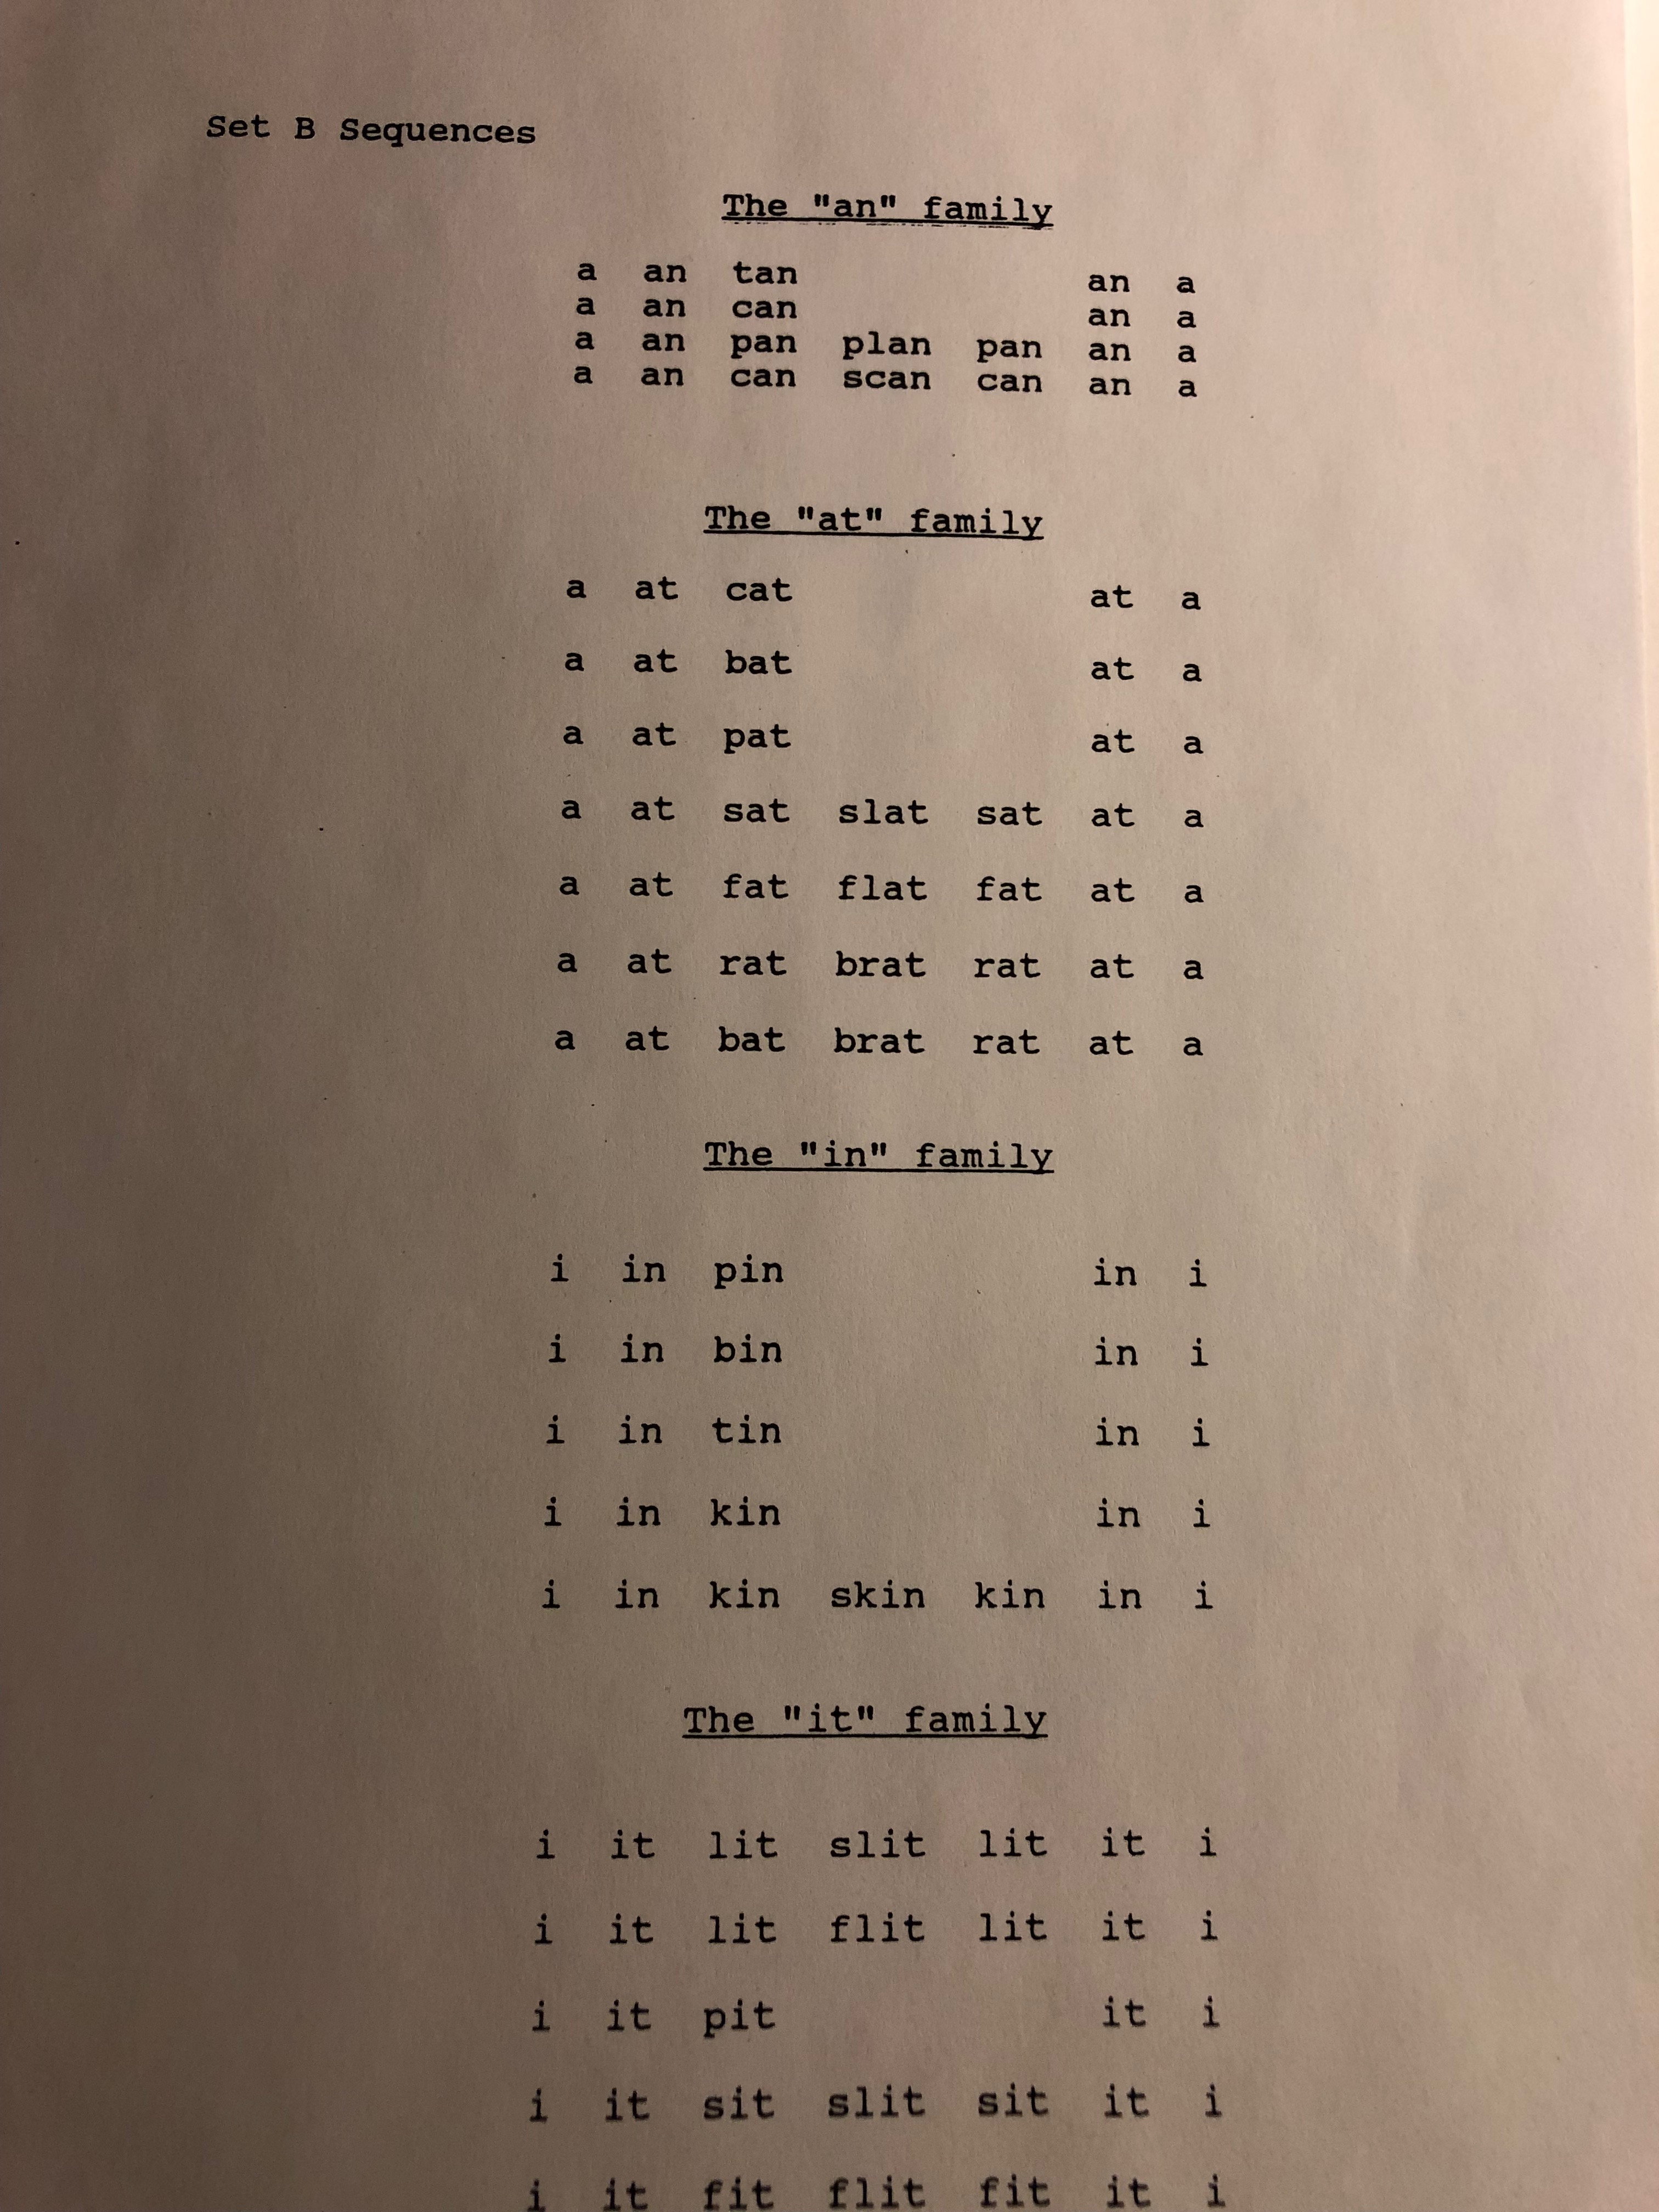
Third – Now you’re going to use the Set B sequences. Just as you did at the beginning with the Set A sequences, start with one sound and proceed up to four sounds and then back again in sequence to one sound. For example,
i – it – lit – slit – lit – it- i
Do all the word families in the set B sequences – remember to stretch out your sounds
Fourth – now mix up using both Set A sequences and Set B sequences – starting wherever you want but always following the ascending/descending sequence. Go through all the word families until your child is able to do this very easily.
Fifth – now use Set A or Set B sounds in isolation without having to follow the sequence. Example:
slit – an – bin – i
Remember – we are not in a hurry. Don’t spend more than 15 minutes a day on the sound counting procedure with your child.
Click on the button to see the sound sequences for both Set A and Set B.
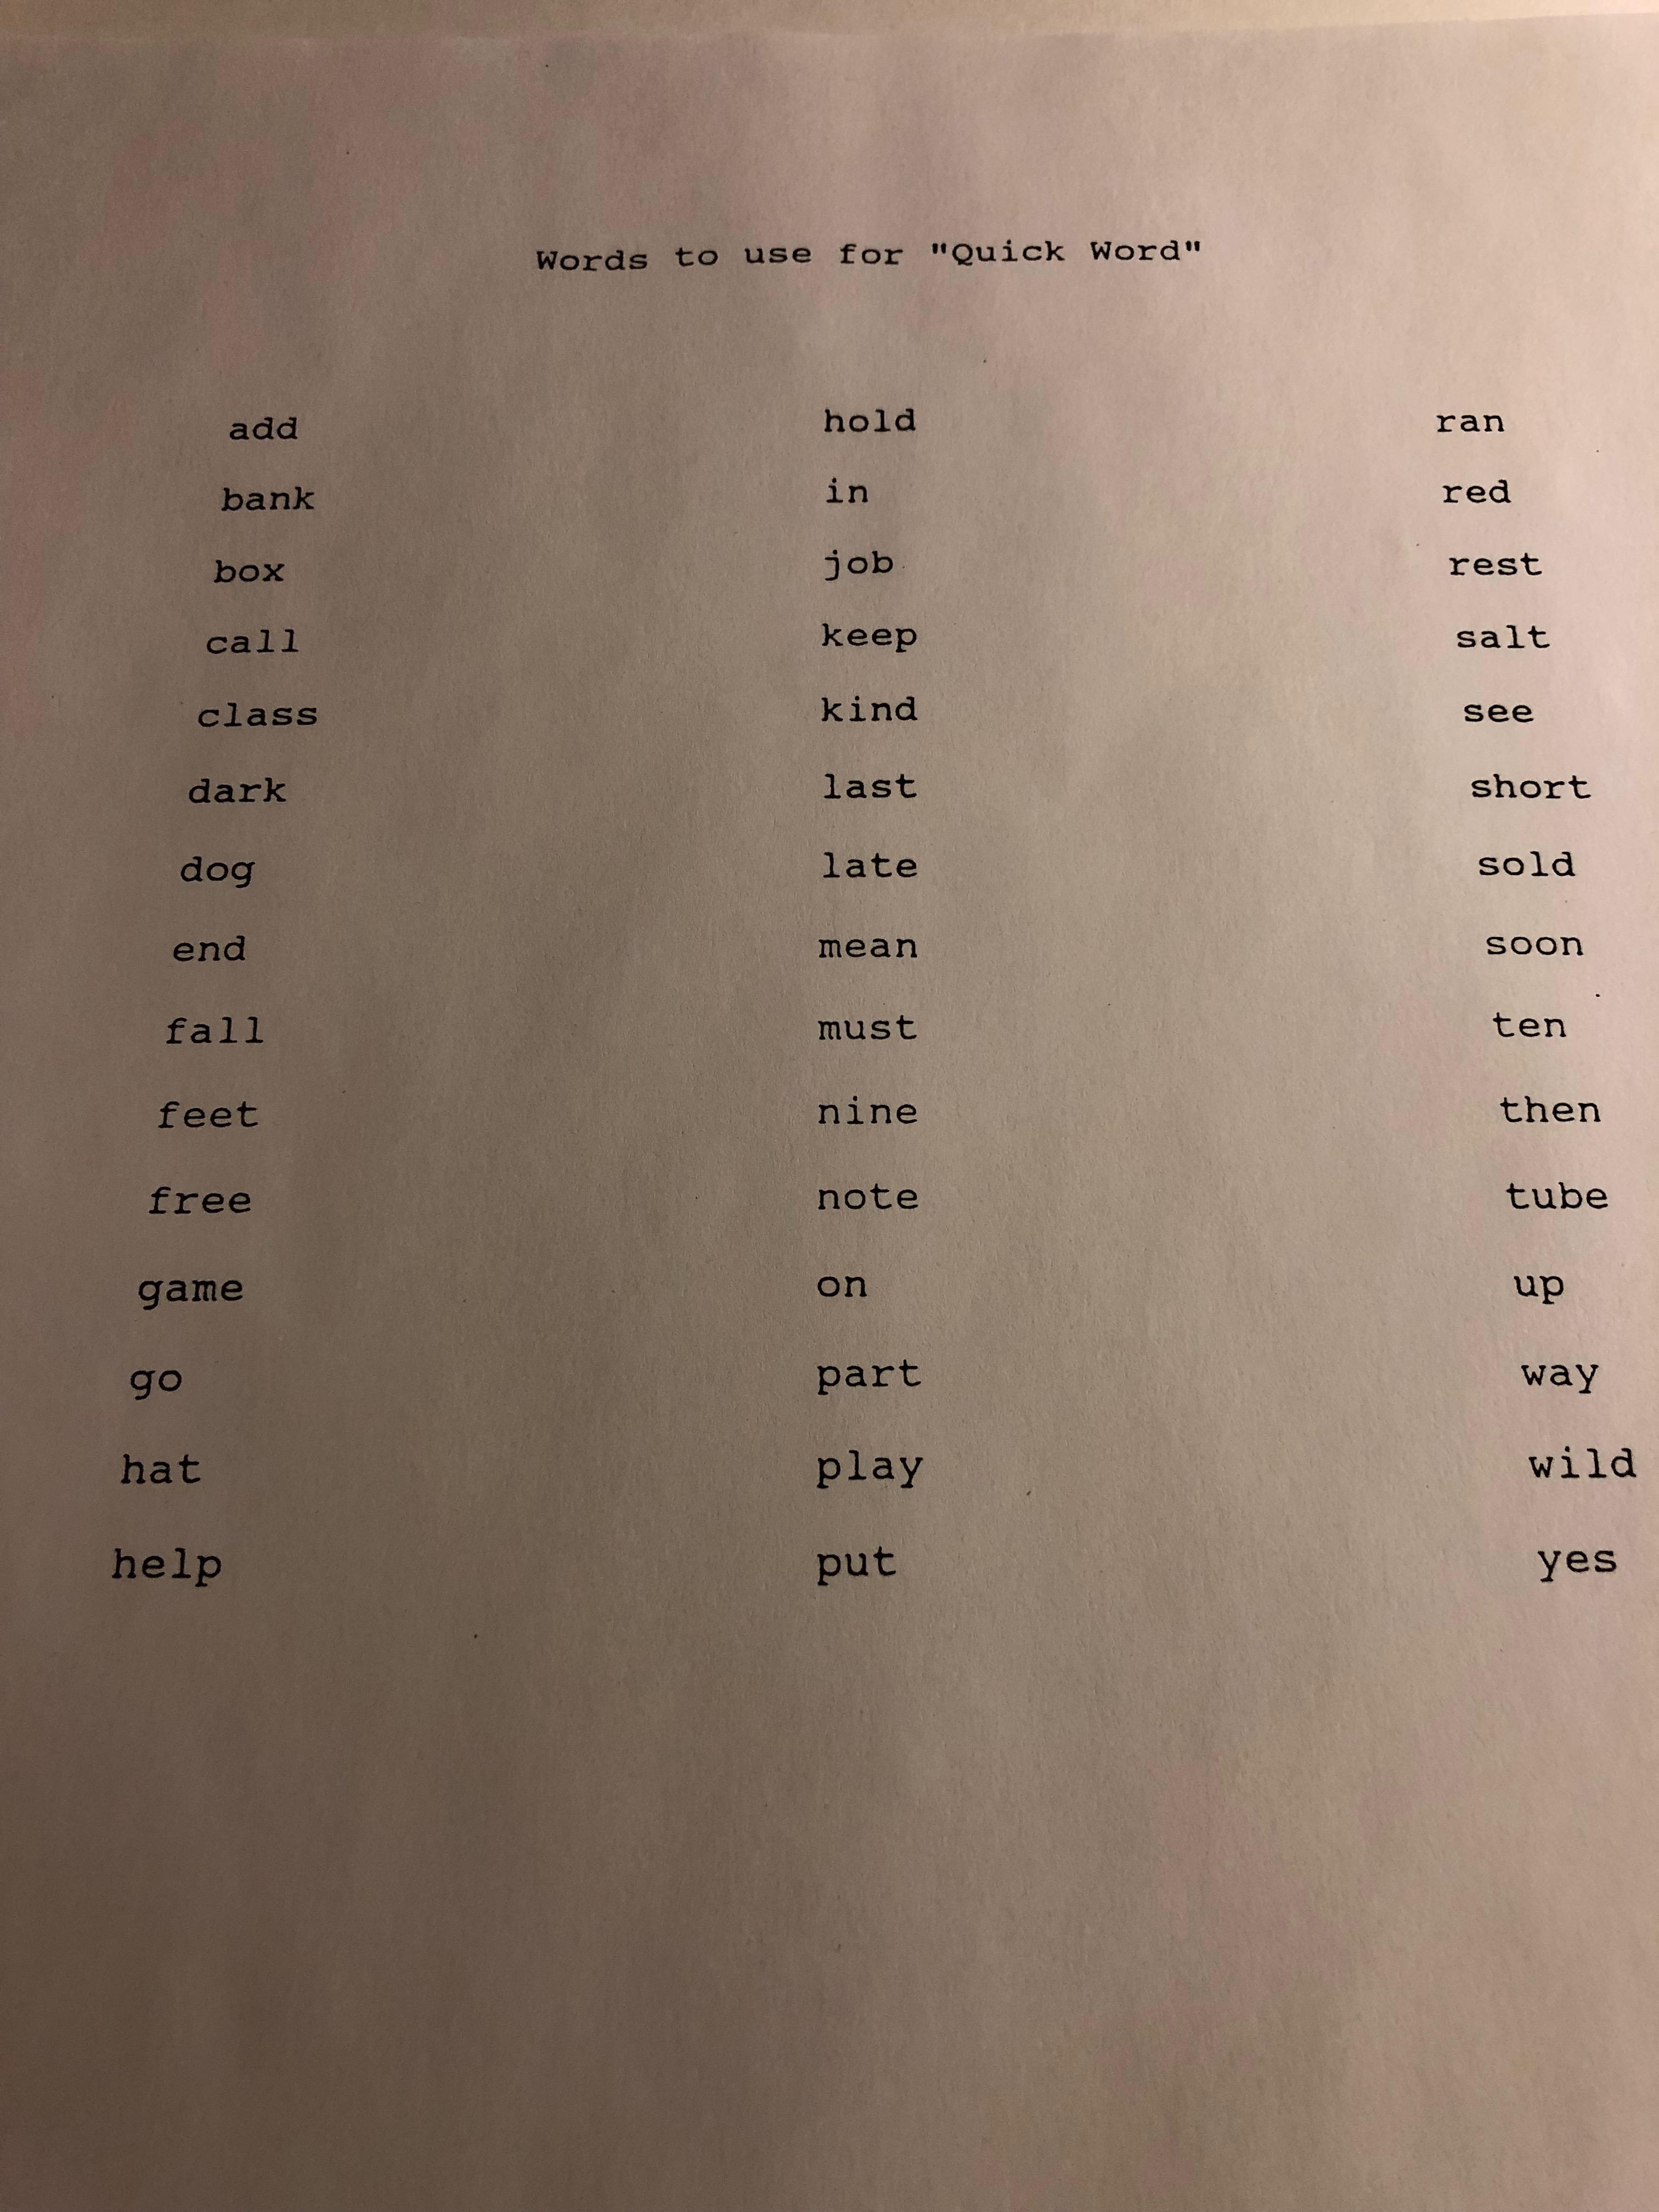
Once your child has mastered sound counting with blocks we will proceed with a very short segment called Quick Word. For this you will continue to provide words in a “stretched- out” way and the student is asked to blend the sounds together to pronounce the word (quickly). Say to the student, “Listen to what I say and you give me the “quick word”.
Tap the button to see words to use with “Quick Word.”
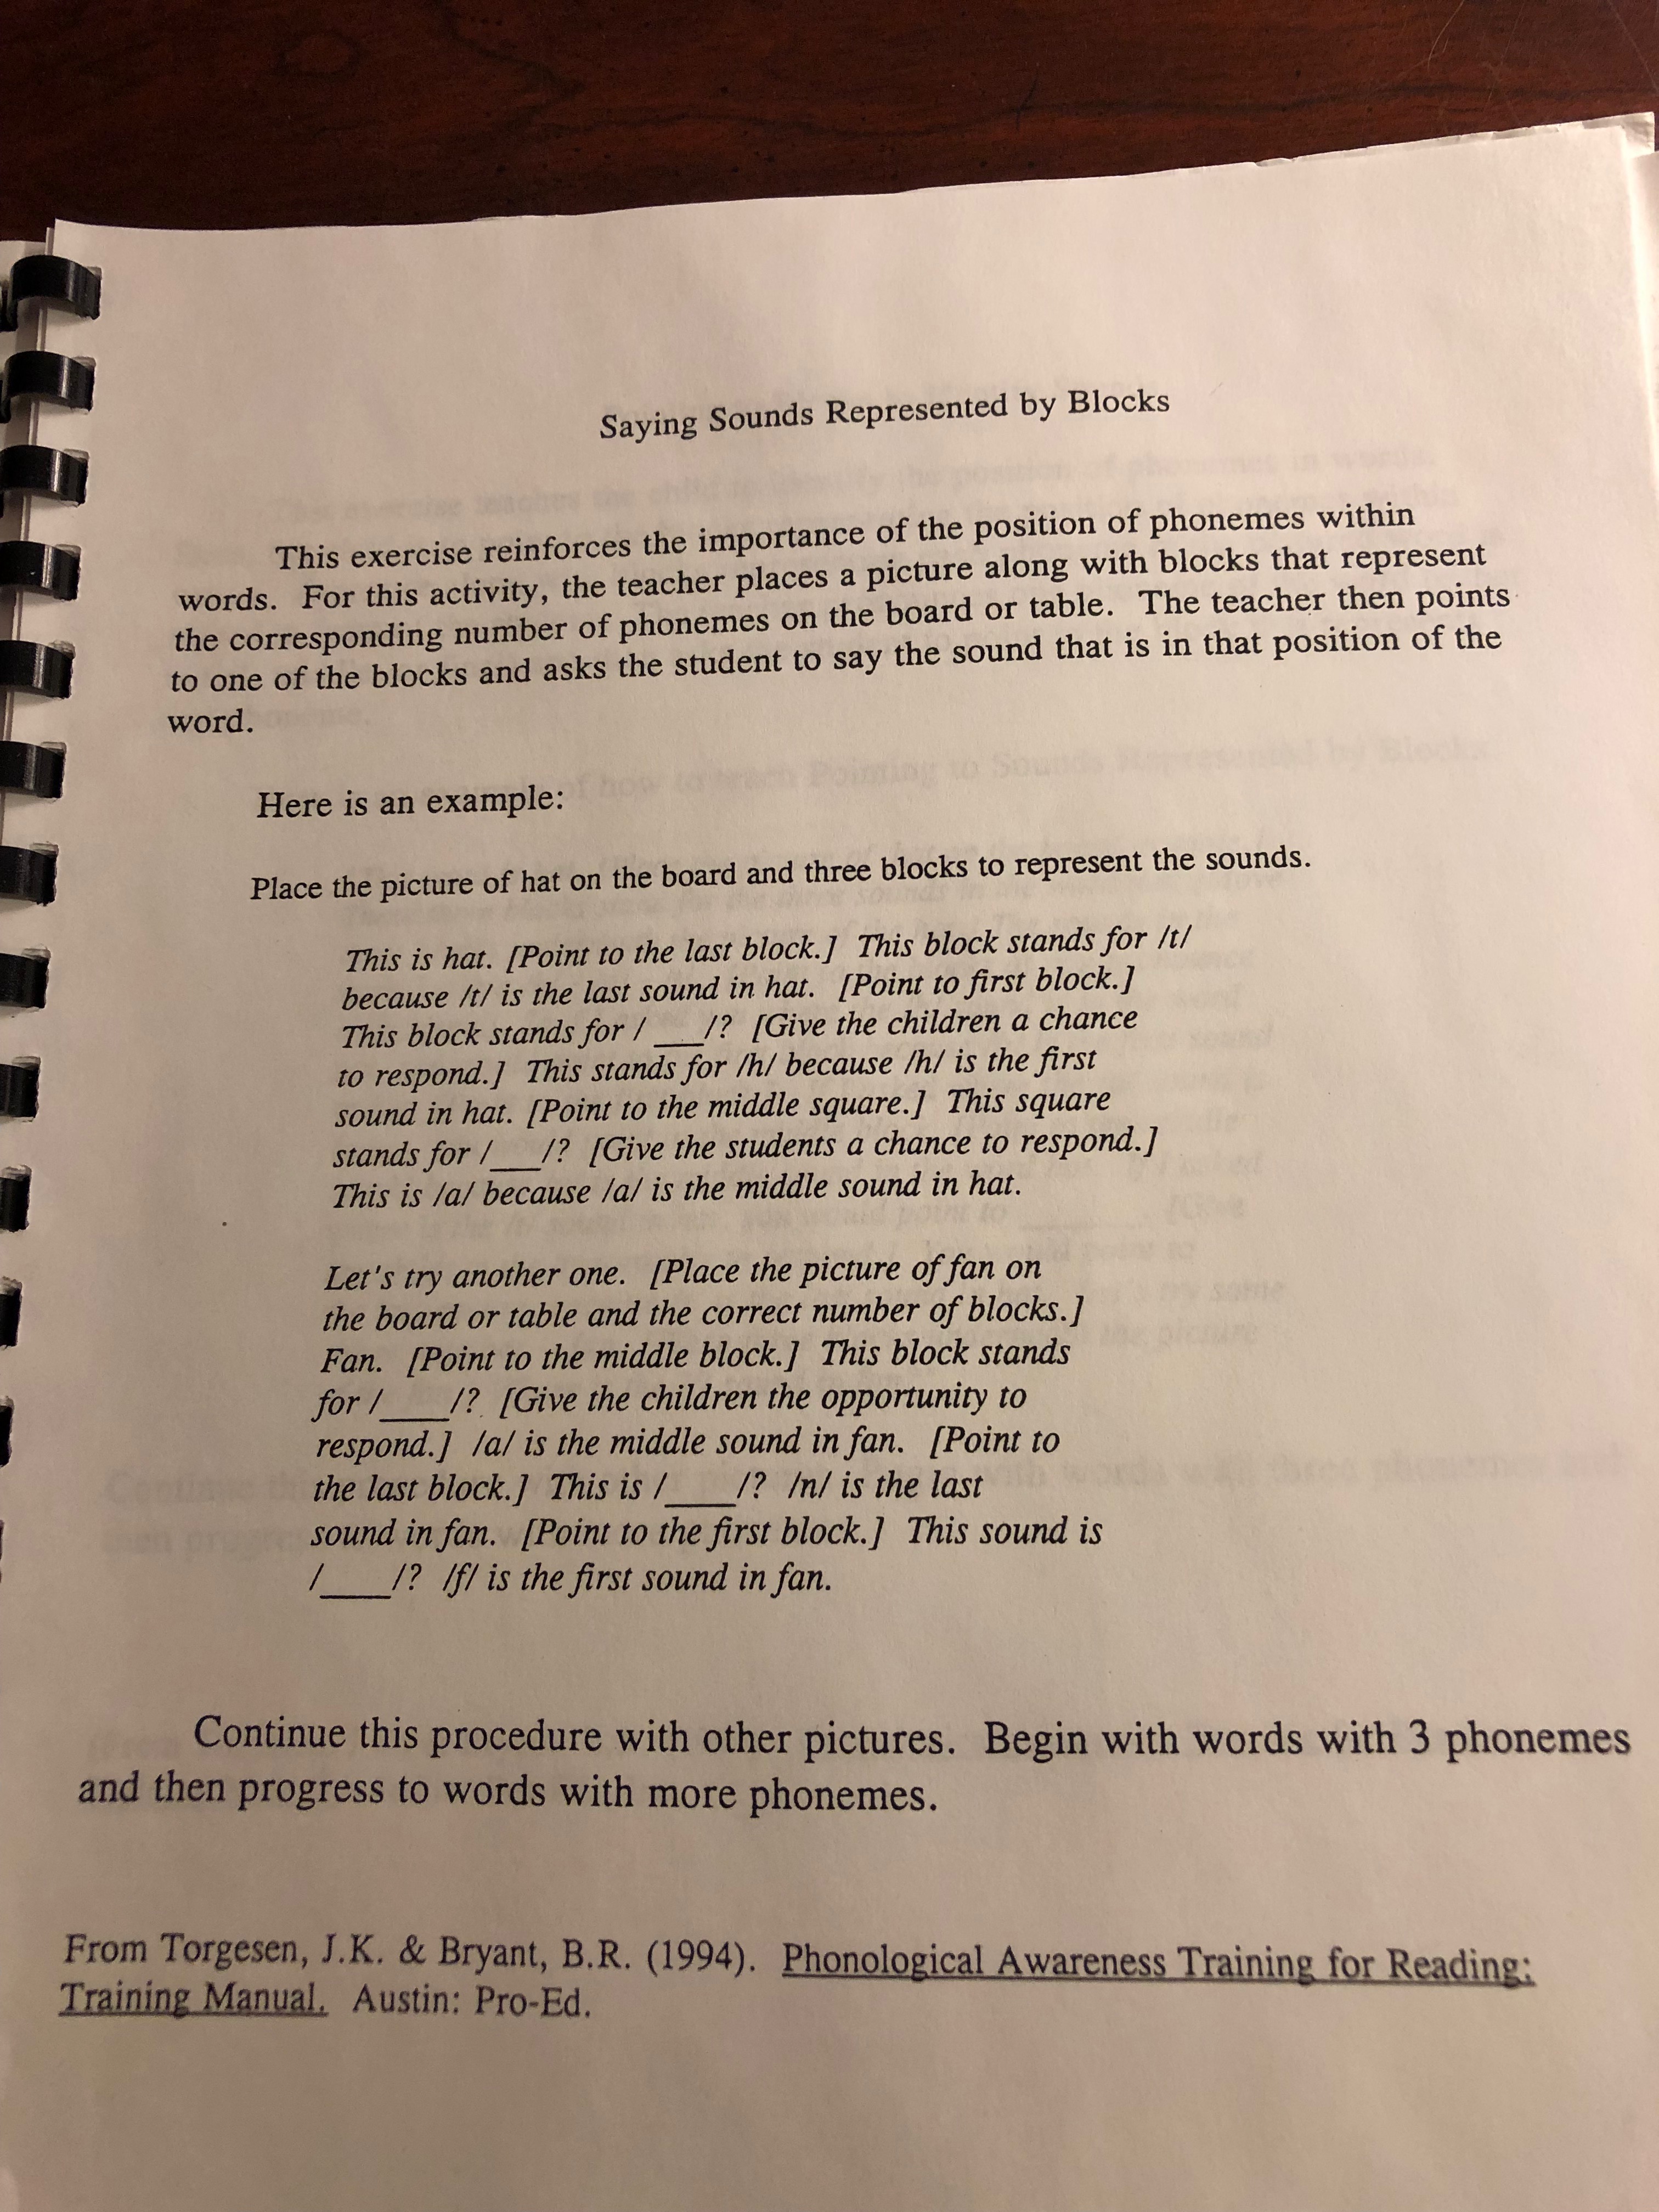
Once the child has mastered Quick Word proceed to Saying Sounds Represented by Blocks. You are again using the blocks in presenting the child with the word, preferably with a picture or representation of the word, e.g. hat and having the child identify where certain sounds would occur on the blocks. Be sure to use the exact number of blocks for the word you are presenting each time. In the original program, there were pictures of various words but it is not possible to display all of these for you on this website but it should be easy to make your own. Whenever you see a letter shown as /h/ you say the sound of the letter, not the letter name.
Tap the button to see the specific directions for “Saying Sounds Represented by Blocks.”
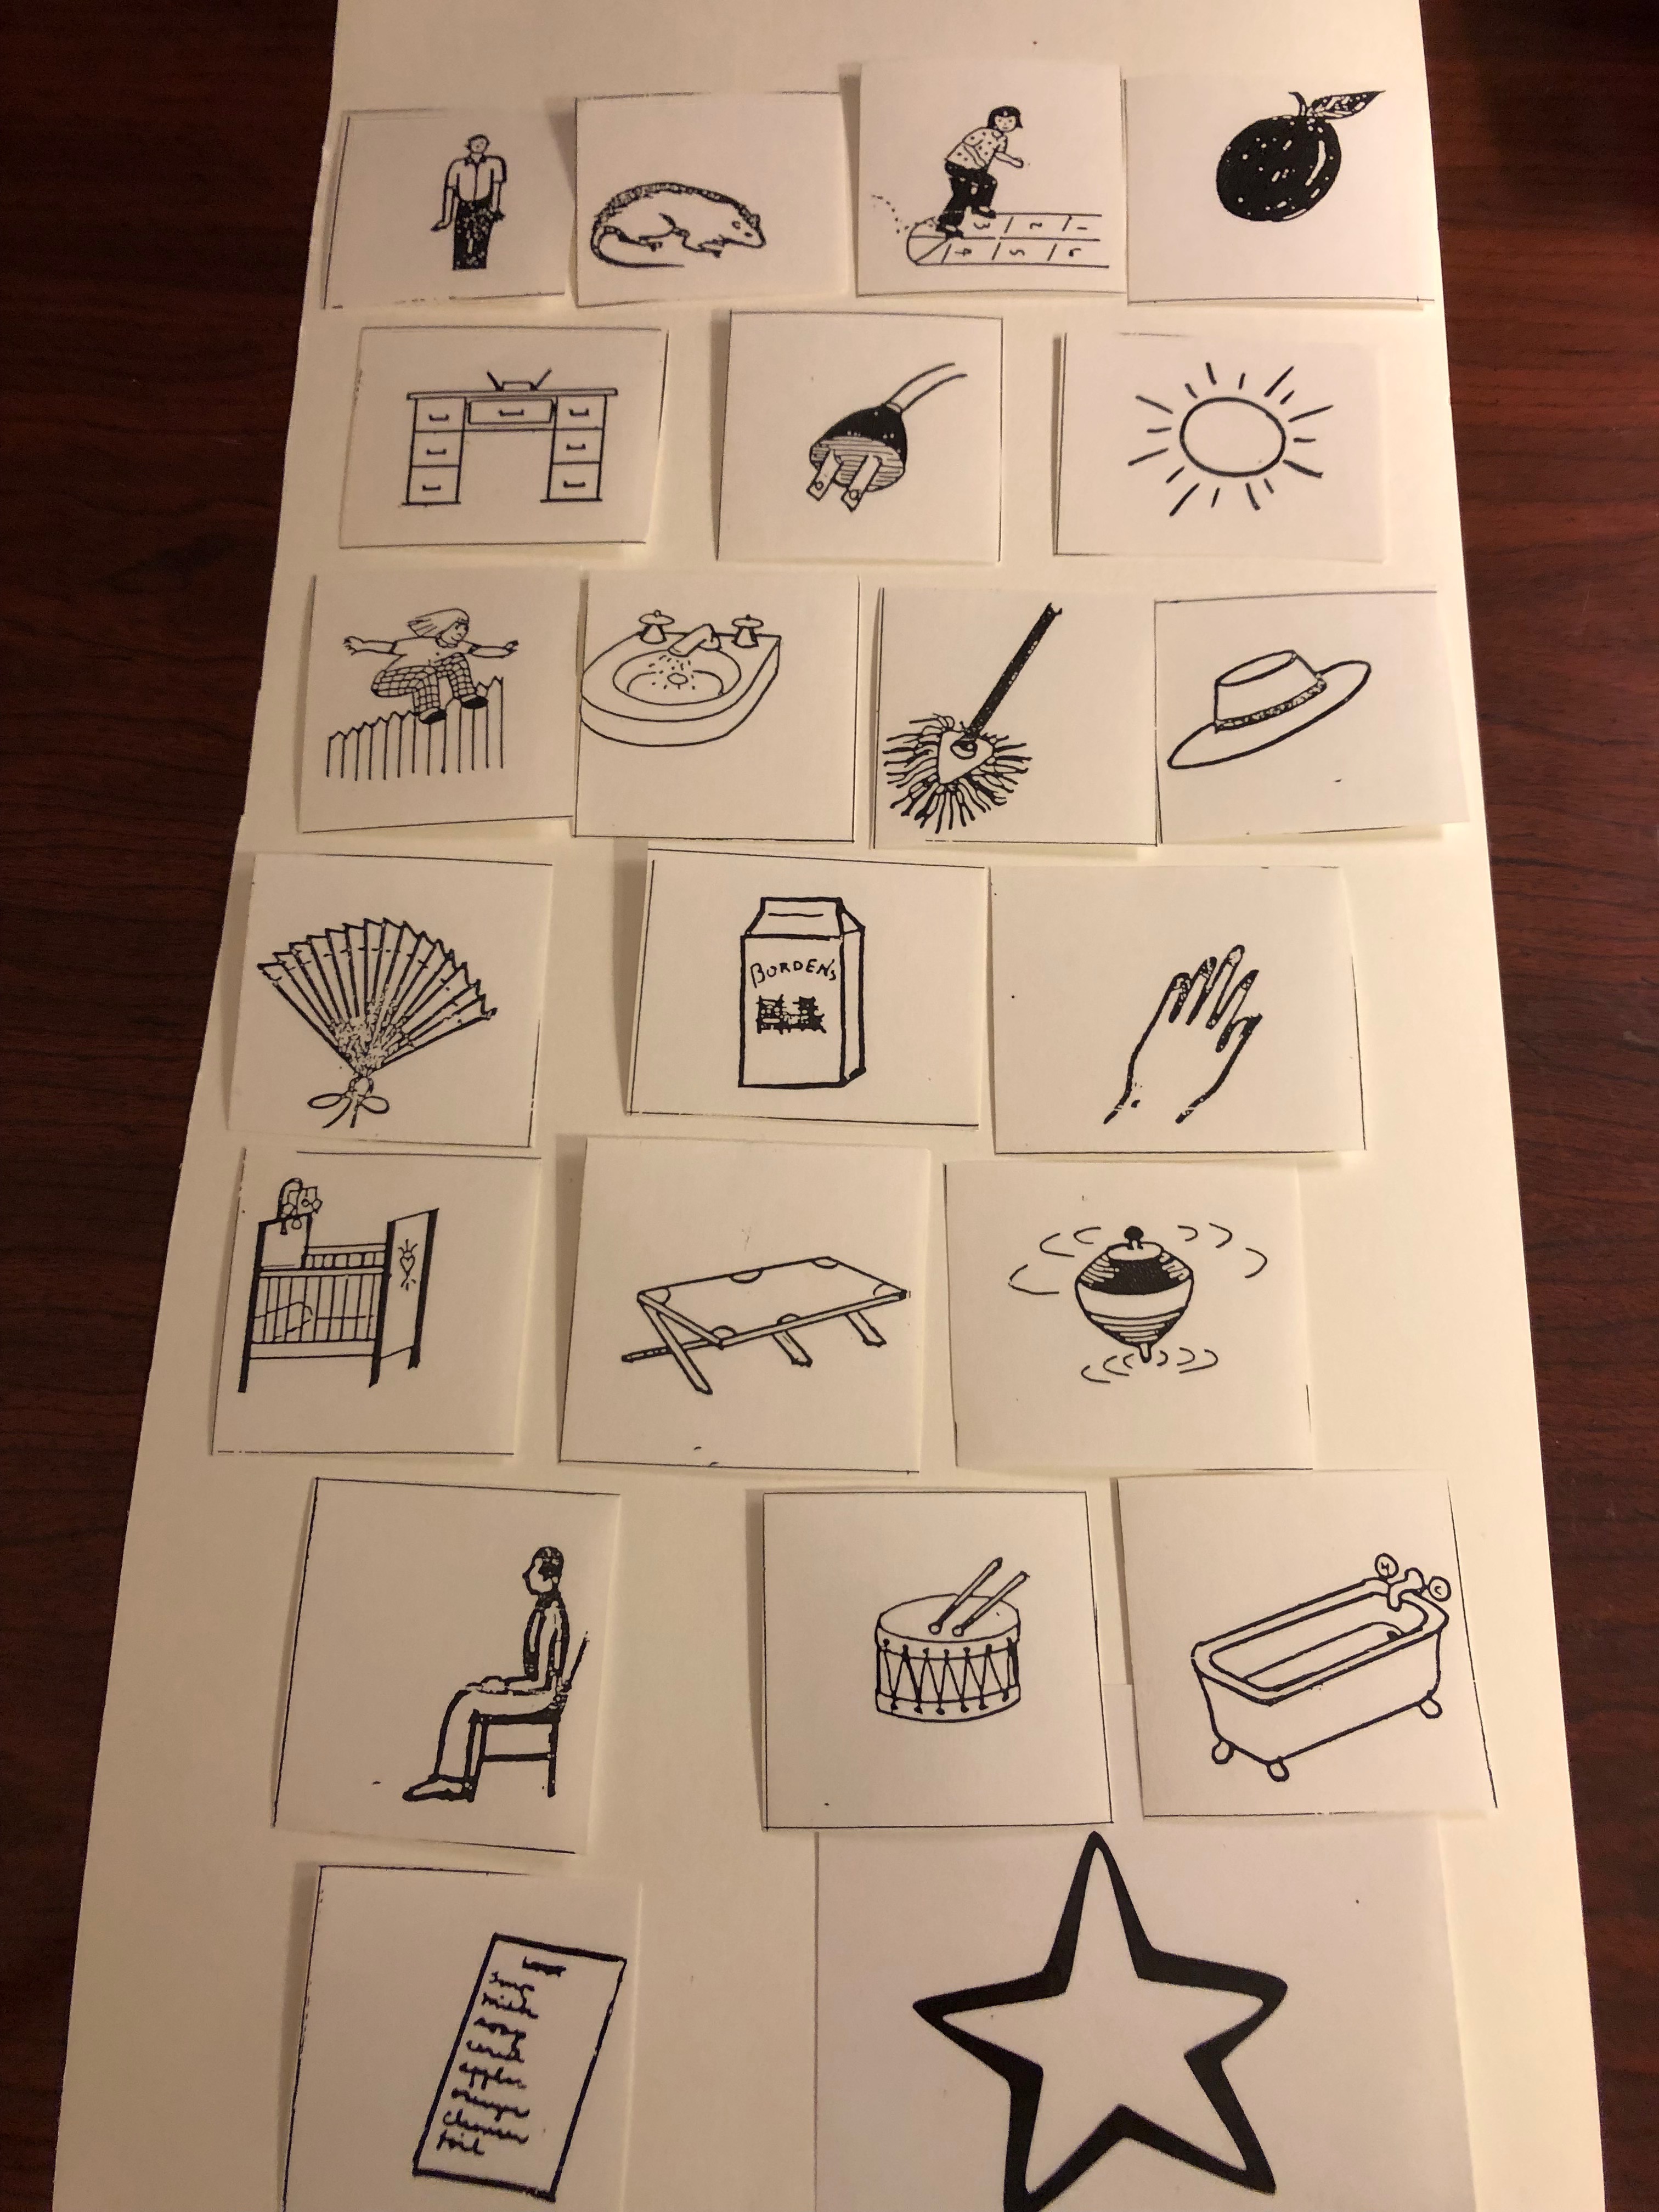
The words used in this section are as follows:
cot hand crib list top sink mop milk tub jump drum
sit desk plug sun man rat hat fan hop plum
Tap the button to see pictures that go with these words – you can easily provide your own pictures
Now proceed to Pointing to Blocks to Identify Sounds. Again using the precise number of blocks in the word, you will have the child point to the block that represents the sound you present. Follow the exact directions.
Tap the button to see the specific directions for “Pointing to Blocks to Identify Sounds.”
The final step in phonological awareness is Sound Counting with Check Marks. In this case, you are making the transition from sounds to an actual graphic representation, showing the child that for each sound heard there is a written symbol. We are not concerned at this time with the actual letter/sound association, but just the understanding of the connection between sounds and symbols. Your child should be working separately with their regular teacher and/or tutor in making sound/letter associations.
For this step, you will need some index cards divided into some with four divisions and some with three divisions. This sounds like it is very easy for the child but it needs to be so to make sure this association takes hold. First present one of the pictures from the previous exercise, have the student say aloud the name of the picture and ask them to put a checkmark for every sound they hear in the word. Start with providing them with either the index card with three divisions for three letter words and four divisions for four-letter words. This is very obvious but needed. Complete the exercise with different pictures/words.
Once this has been mastered, start giving the child an index card without sections. Here, the child must determine the number of phonemes without the aid of the correct number of sections. Go through all the pictures and words you have used before. Once this has been mastered, proceed to the teacher saying the word, the child repeating the word, and then the child making the marks in the rectangle. Finally, use printed words in place of the line drawings.
The following portion of the Preventing Early Reading Failure program is the most fun for both you and your student. However, it is extremely important not to skip the preceding steps and try to go into this activity. This section is entitled “Phonological Recoding” and is basically designed to teach the child “how” to go about thinking when learning to decode words. It emphasizes metacognition as well as providing a hands-on activity that is appealing to the child. By the way, this was even adapted to be used in whole classroom instruction with children following the pattern set by the teacher at their own desks with her own cookie sheets.
It is extremely important to follow the basic directions verbatim as what we are doing is teaching the child what to be thinking as they proceed with the program. Learning how to do this is much more important and long-standing than simply memorizing words.
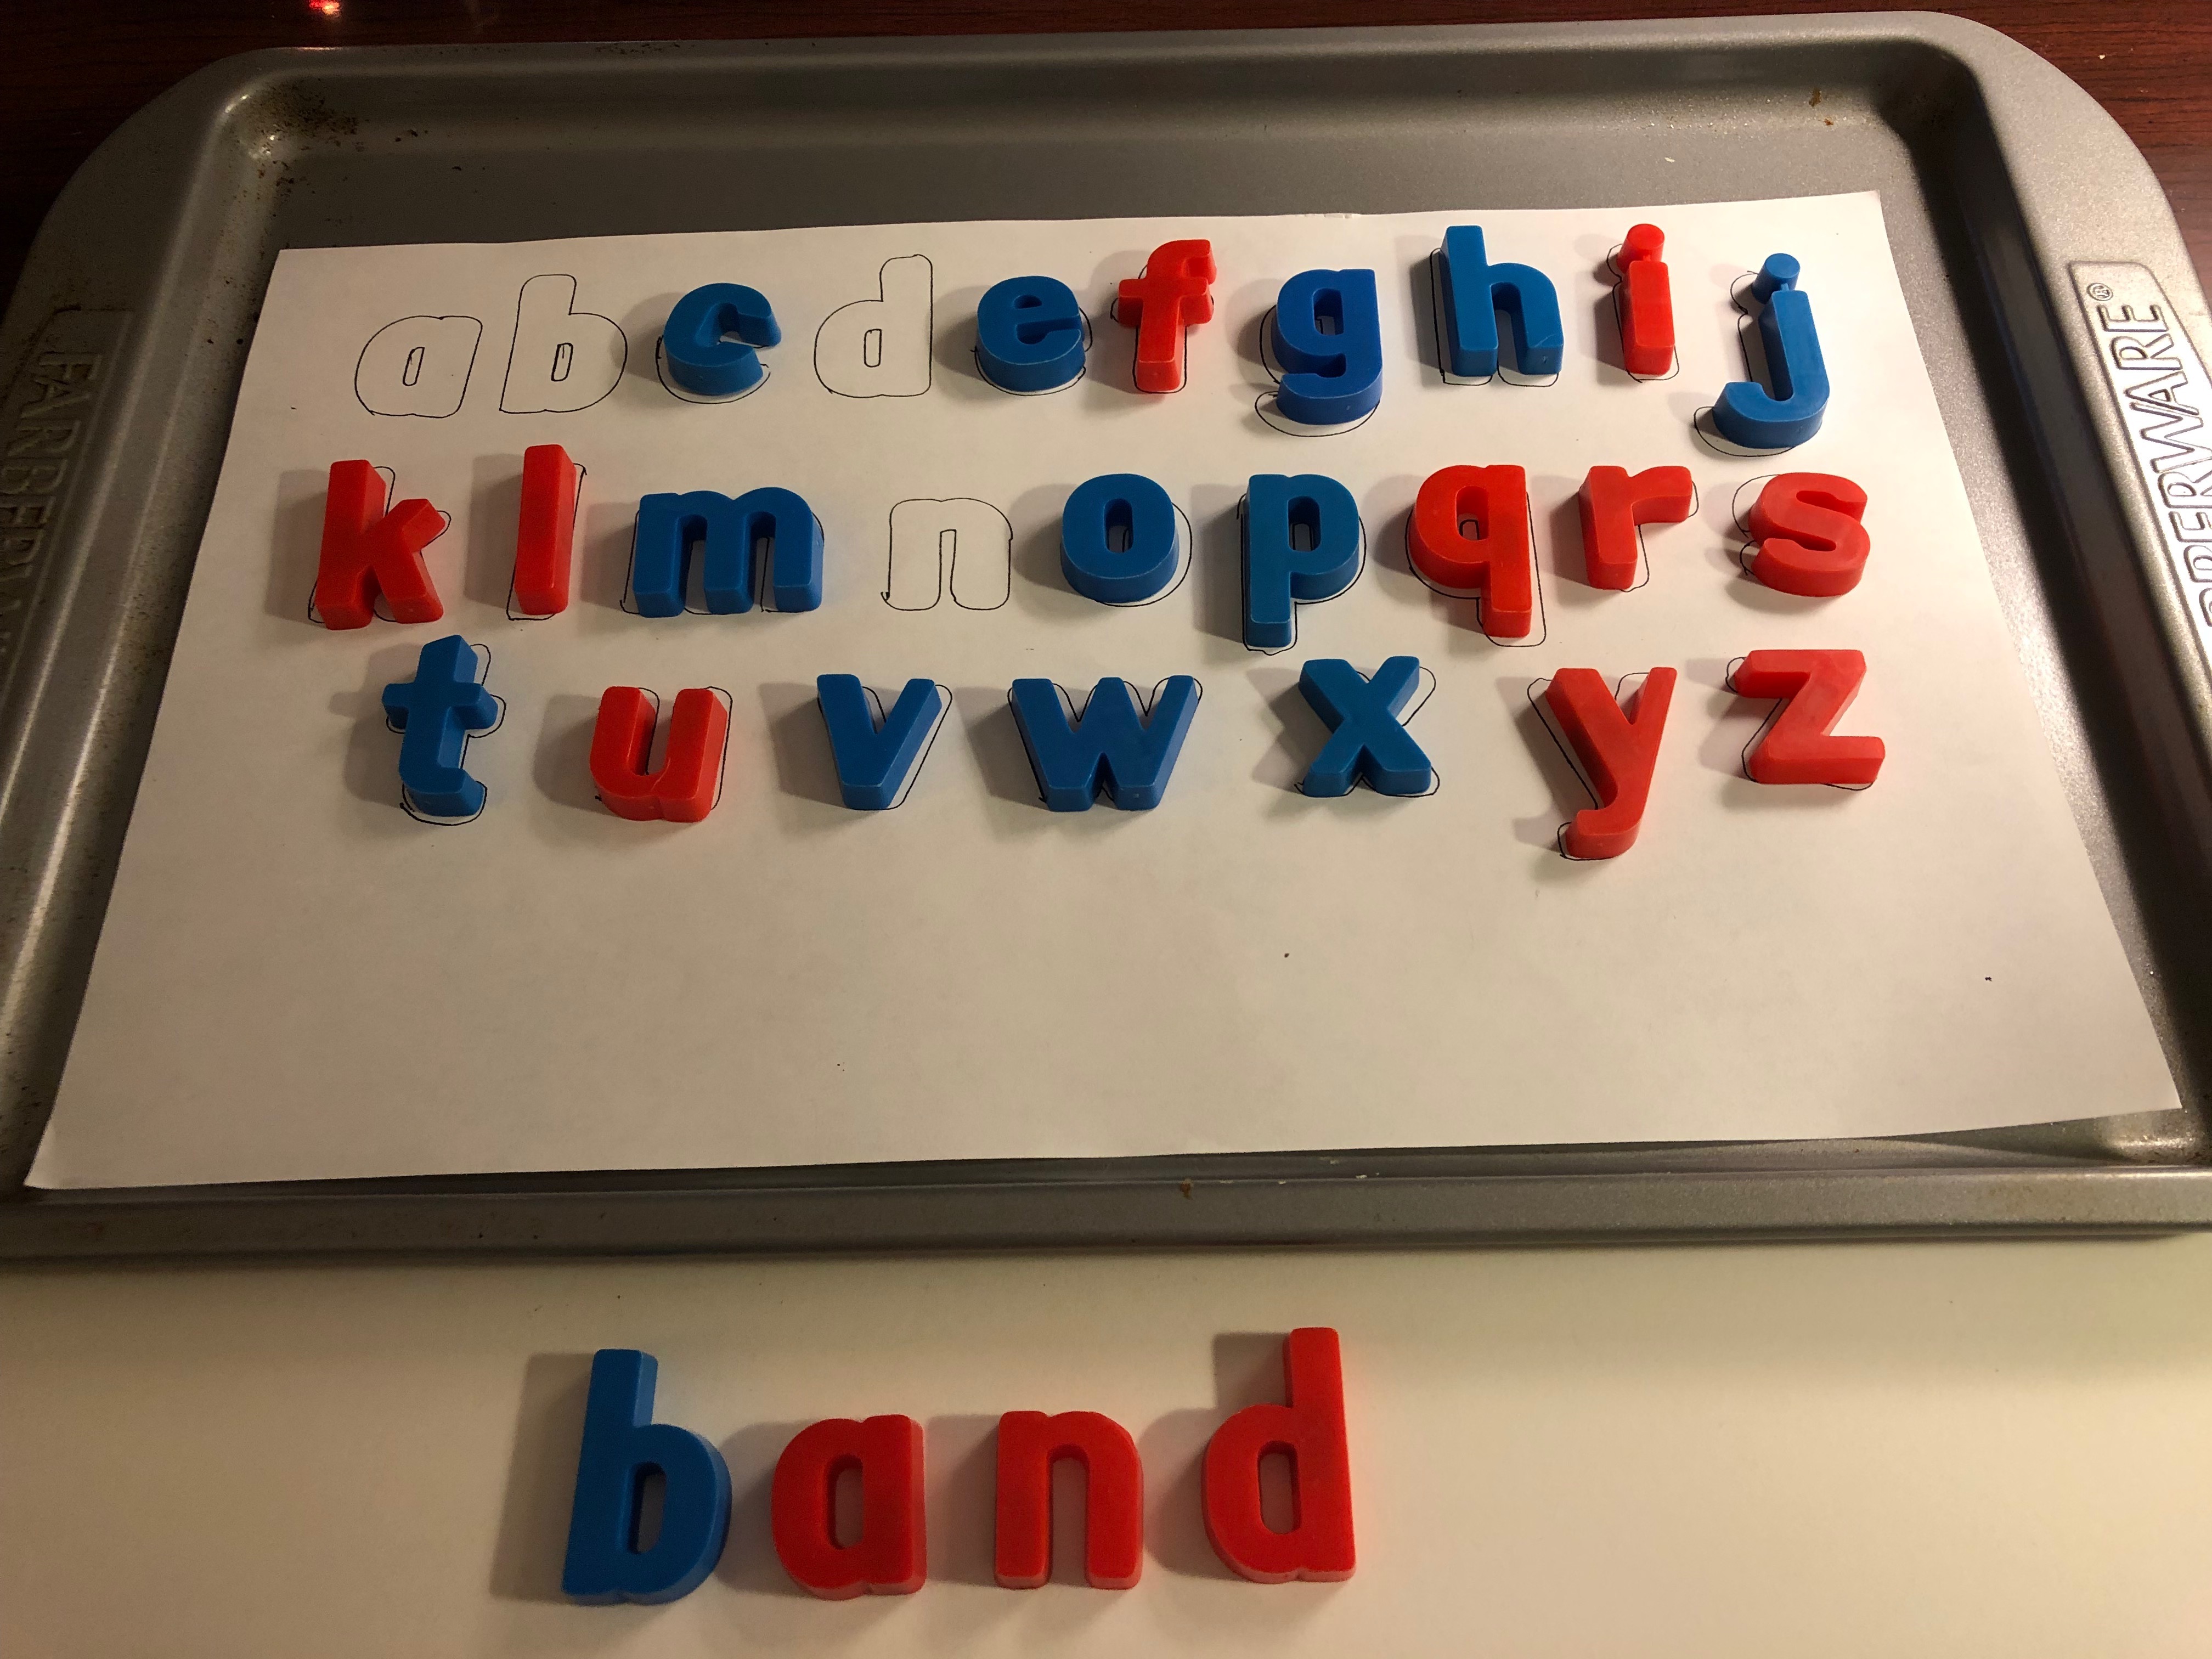
For this, you will need the lowercase magnetic letters, a cookie sheet and a place of plain paper. Experience has taught us to first make a template of the letters in alphabetical order by tracing them and then put this on your cookie sheet so it is easy for you to replace letters where they belong.
Basic Directions
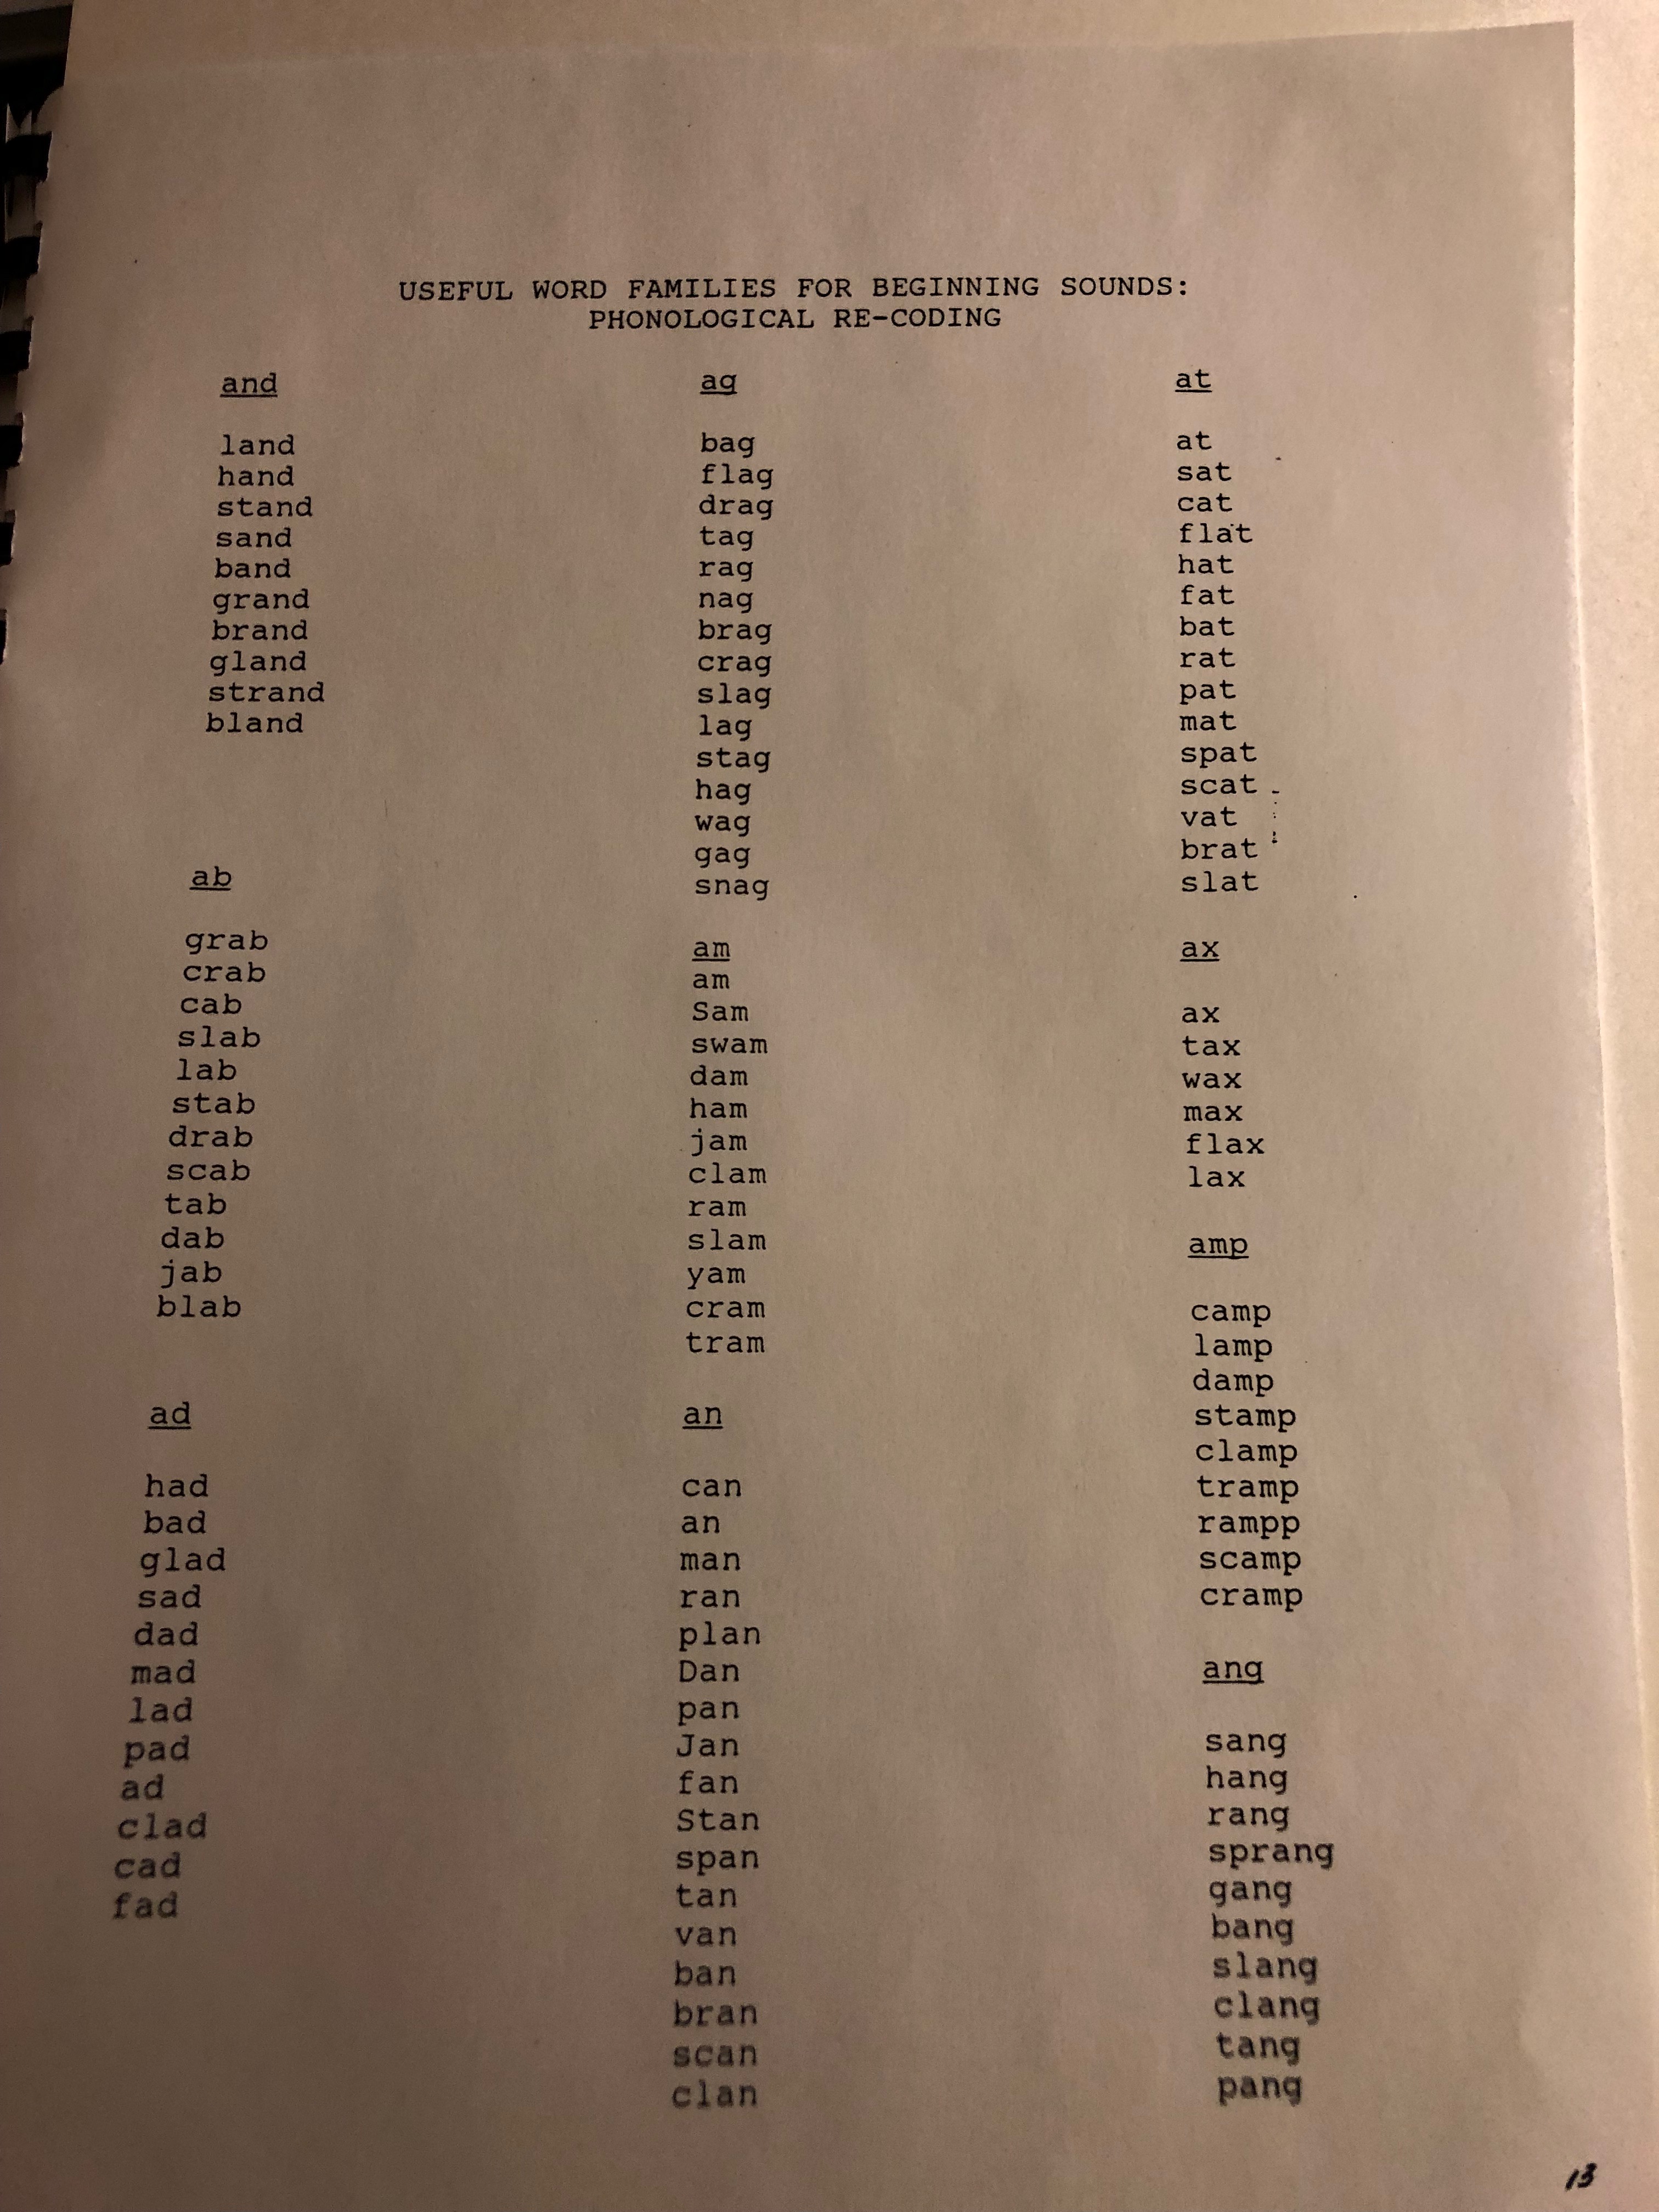
Refer to the section labeled “useful word families”. I have only listed some beginning examples as it would be difficult to list all the possible word families that can be used. Parents should obtain the book, “The Reading Teachers Book of Lists” which should be available through Amazon and provides a good listing of word families as well as various spelling patterns. At first, we will use word families that are phonetically regular. After mastery, you can start on irregular word patterns that do not fit phonological rules, of which there are numerous examples in English. Pick the word family you want to start with and working with one word at a time use the following procedures, demonstrated with the word “and”.
1. Arrange magnetic letters in alphabetical order. Parent makes the word and and says, “this word says and. Say to the child, “what does this word say? Child responds.
2. Replace letters. Ask the child to make and. If the child is unsure, the teacher provides a model using the magnetic letters.
3. After child makes the word, the teacher says, “what word have you made?”
4. After the child responds, teacher jumbles letters and asks the child to make and again and to say the word she/he has made. Repeat process until child demonstrates can do easily.
5. Parent puts s in front of and and draws the child’s attention to the new word by running a finger underneath the word while saying, “Look, if I put an “s” in front of and it says sand.” The teacher asks the child to say the new word.
6. The parent removes the “s” and says, “if I take the ‘s’ away, it says and. Now you make ‘sand’. After child makes word, parent asks, “what word have you made?”
7. Ask the child to make and. Repeat the process with two other words in the word family (steps 3-6) hand, band.
8. Teacher successively makes sand, band, hand, and and, each time asking the child what the word is.
9. The teacher then asks the child to make and, hand, sand, and band on his or her own.
Go through all of the word families available through your lists from The Reading Teacher’s Book of Lists starting with those where you can change only the beginning sound, digraphs or clusters.
Check the button for one page of Useful Word Families for Beginning Sounds.
As you proceed in your fun work with your child it is important that you follow the sequence of:
- Initial sounds, letters and clusters
- Final sounds
- Medial sounds, letters, and clusters
You will need to modify instructions a little when changing medial letters and when deleting initial and final letters or letter clusters that did not result in a complete word.
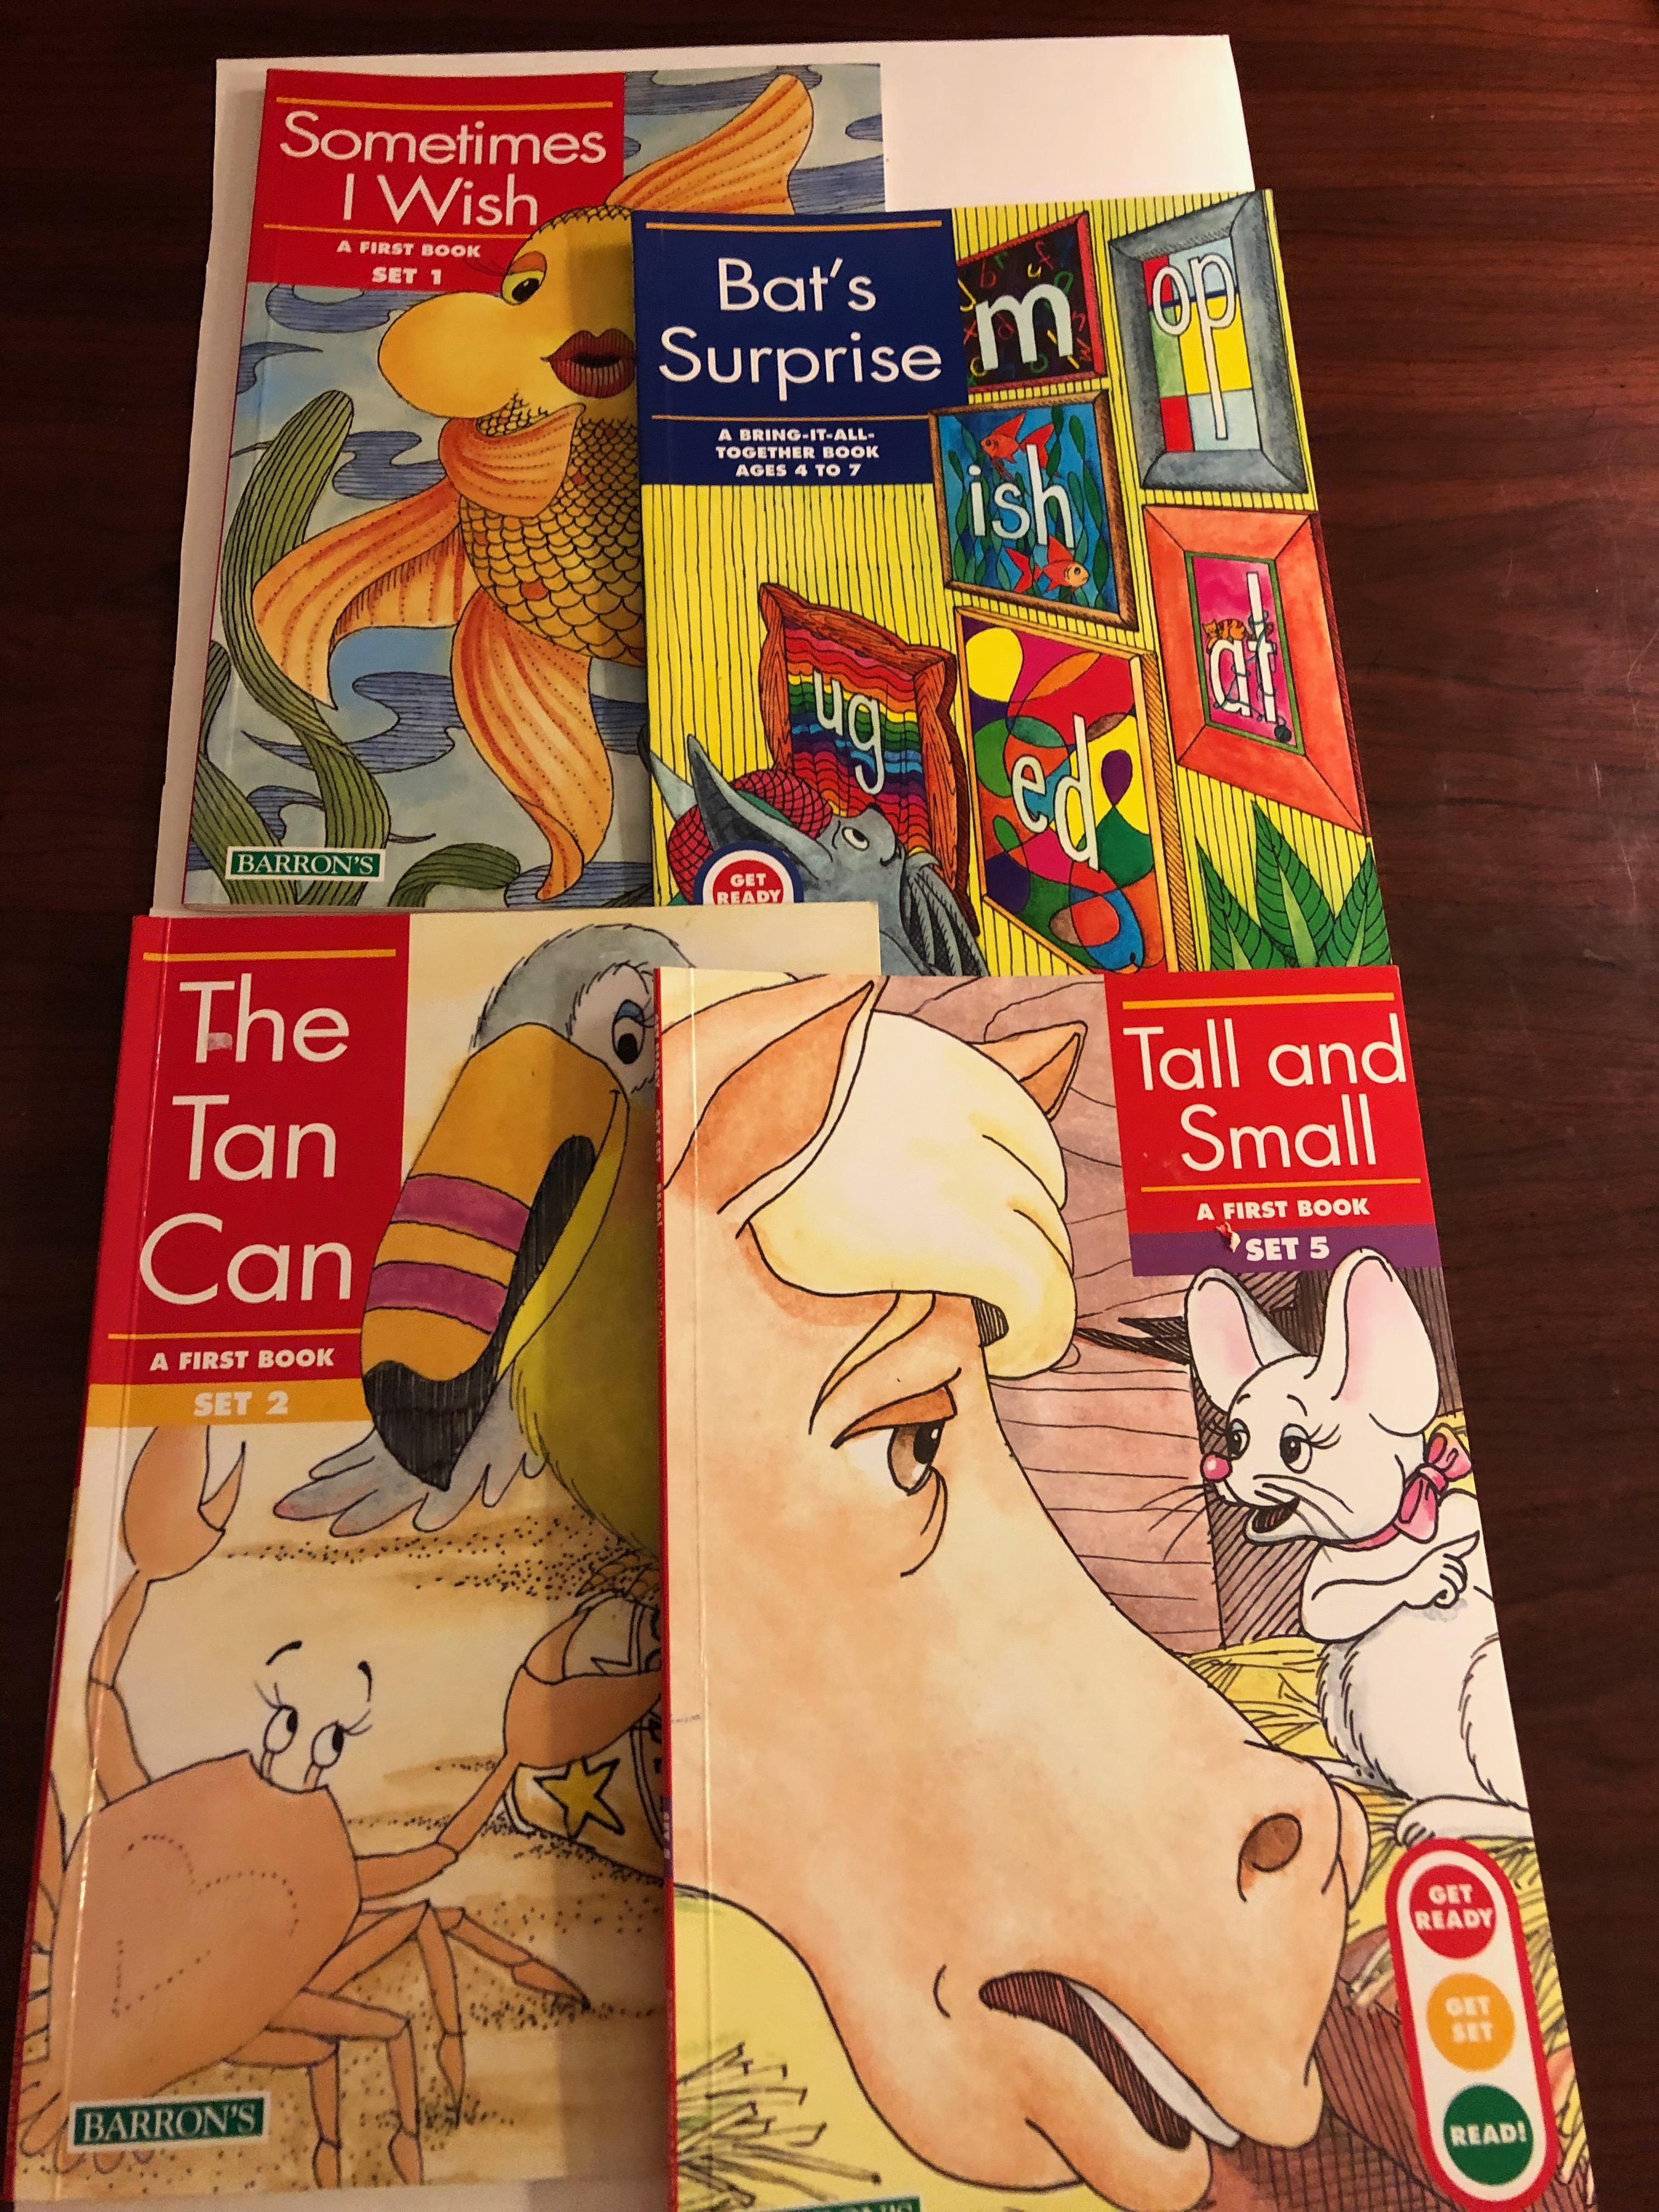
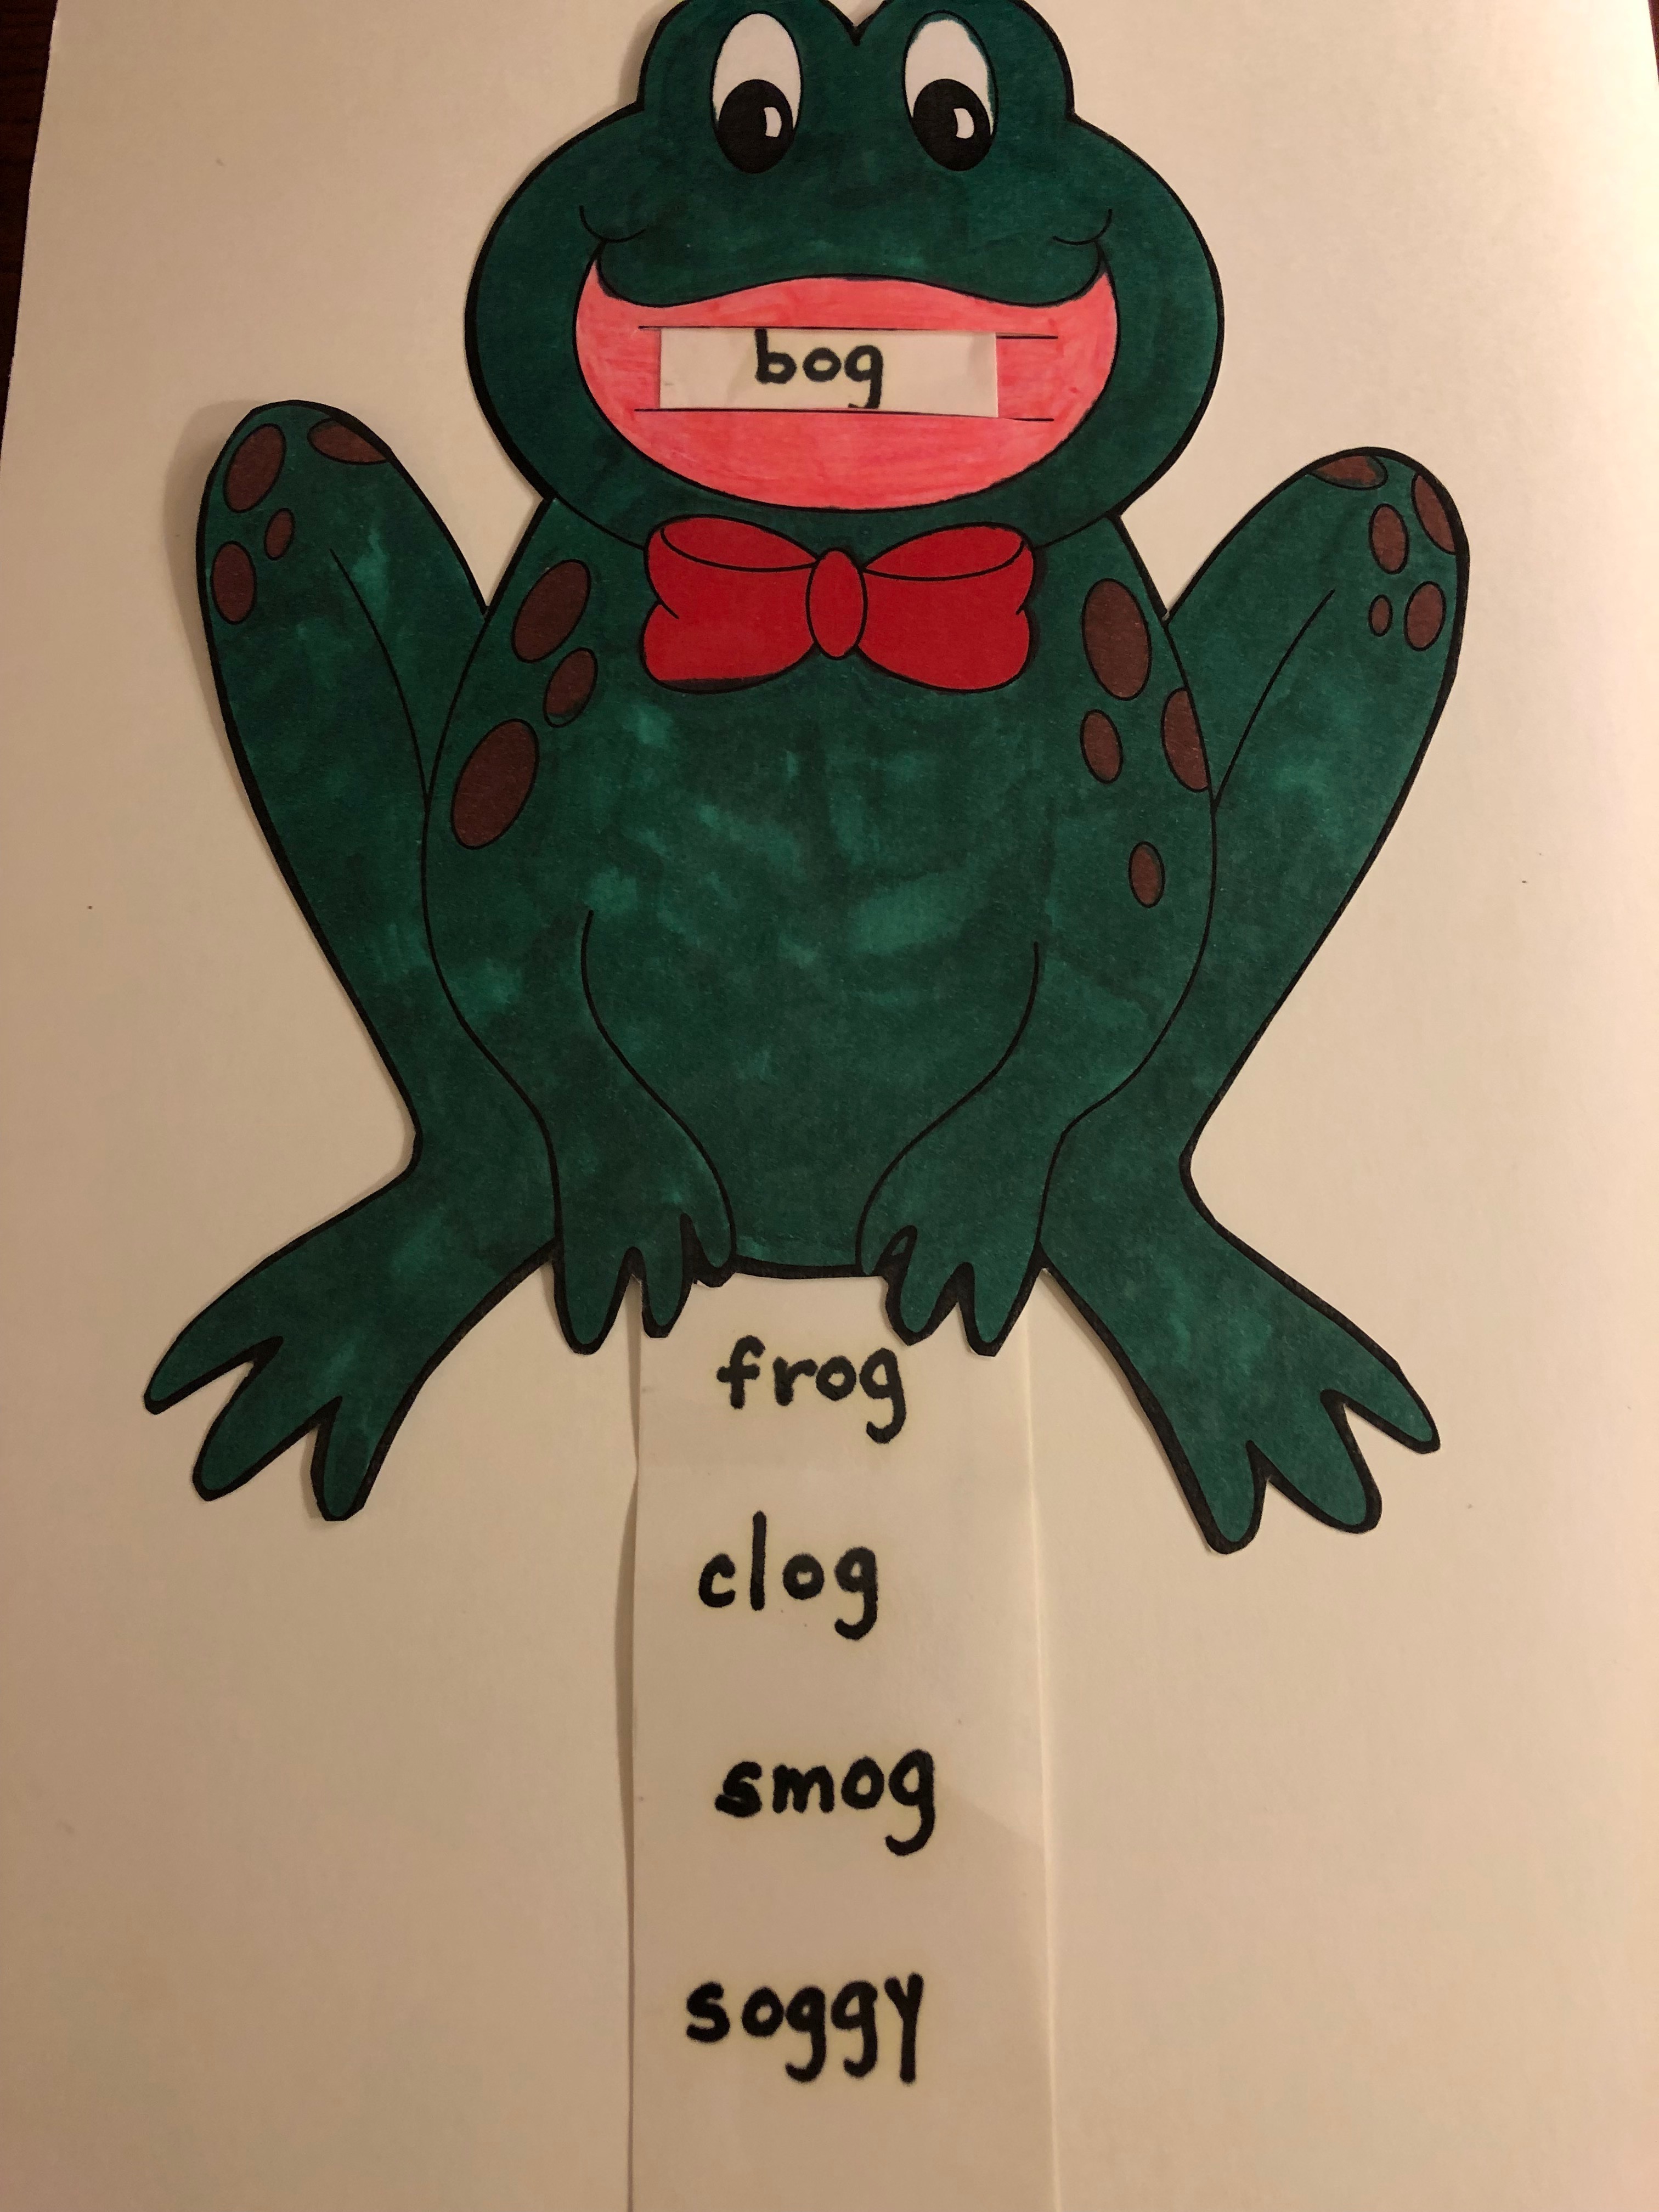
I also highly recommend that you combine other activities with the word families you are presently working on. This could be writing a story using as many of the word family words as you can in the story or constructing a device where the child can quickly change the beginning sound of a word family in a fun way and tell what the word is. There are also books that children can read that emphasize such word families. Combining these activities with the actual instruction is quite valuable.
Click the buttons for some examples of these techniques.
Now comes the really fun part! When a child can do this they are well on the way to being an effective and efficient reader.
Once the child has demonstrated control of the preceding tasks, the parent or teacher can begin working for flexibility and fluency among words. For example, the child can be asked to change as to has, to hat to pat to pit to pot to got to get.
Also, ask the child to use 3 letters to make a word; use 4 letters to make a word; to change one letter to make another word; and to change the first, last or middle letter or cluster to make another word. Later, have the child perform the same activities as a writing task rather than a letter manipulation task.
You can see that once the child is able to perform these tasks – which are fun – he or she has developed the metacognitive strategies necessary to be an efficient reader.
A few other points:
After doing this work using phonetically regular word patterns, you can start to use common irregular word patterns, e.g. “ight”. Help the child recognize the pattern within other words by highlighting and especially by using magnetic letters. By doing this, you are helping the child develop the visual memory or impression of the word part. It then would be helpful for her, again using magnetic letters, to be shown how various words can be made from this word part by manipulating other letters. Use the same procedure as before, e.g., saying, “if I take the letter ‘f’ and put it in front of the ‘ight’, we have made the word fight. If I take the ‘f’ away, we then have “ight”. You can use the basic phonological recoding directions for these irregular word parts so that the student can make words such as might, light, night, right, tight, sight, flight, blight, etc. It is very important that these word patterns be taught as a group rather than in an isolated way. Students should be encouraged to use verbal skills to talk about these word patterns and should be encouraged to keep their own little journal of these word pattern spellings.
Throughout all these tasks the parent or teacher should positively reinforce all correct responses with specific praise – providing reinforcement for the process in which the child was engaged in as well as the product. “Good job! – “What a hard worker you are! – “Look at that word you made!” – “Nice work!”